********If you already have a skater model then start here. BUT! if your skater model is not in a T-Pose? see this post before continuing this step:
http://thpsx.com/forums/index.php?topic=560.0
**********
==============================================
WEIGHT TRANSFER YOUR MODEL.
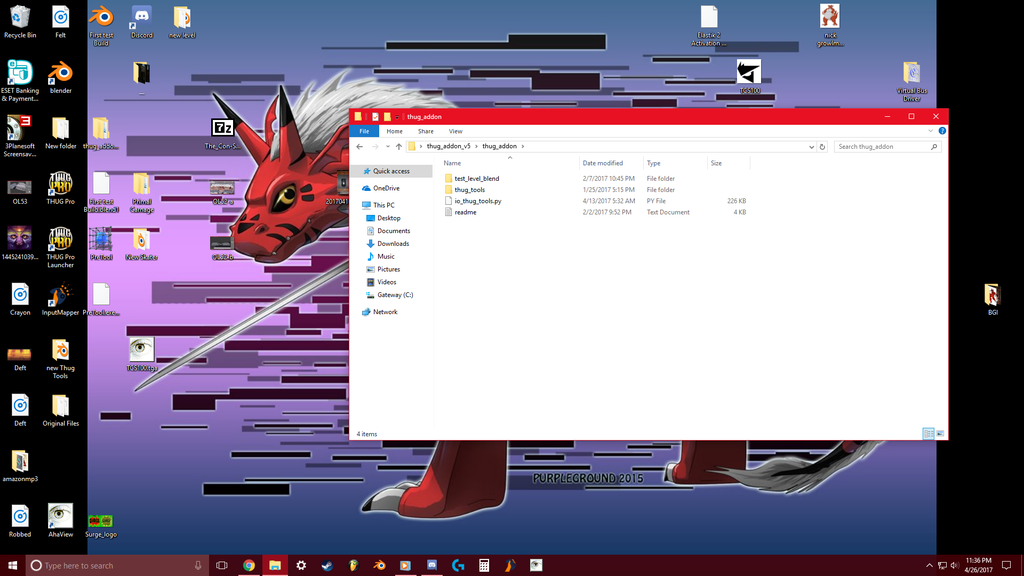
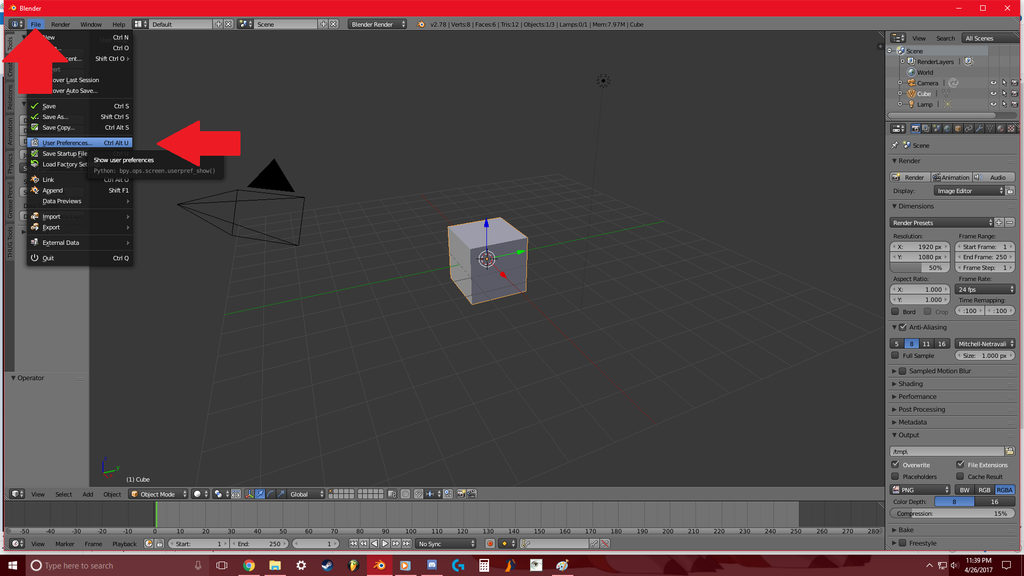
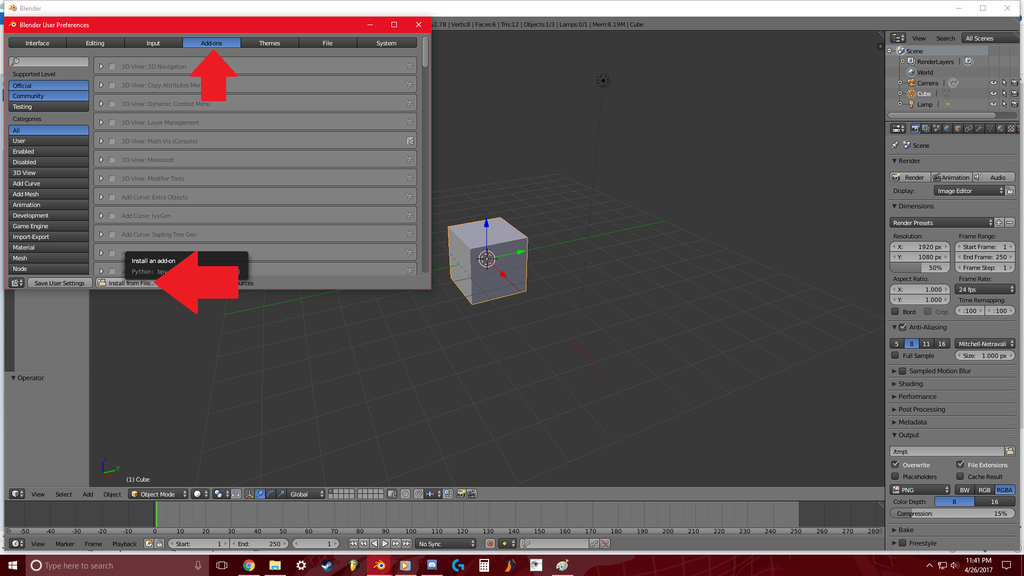
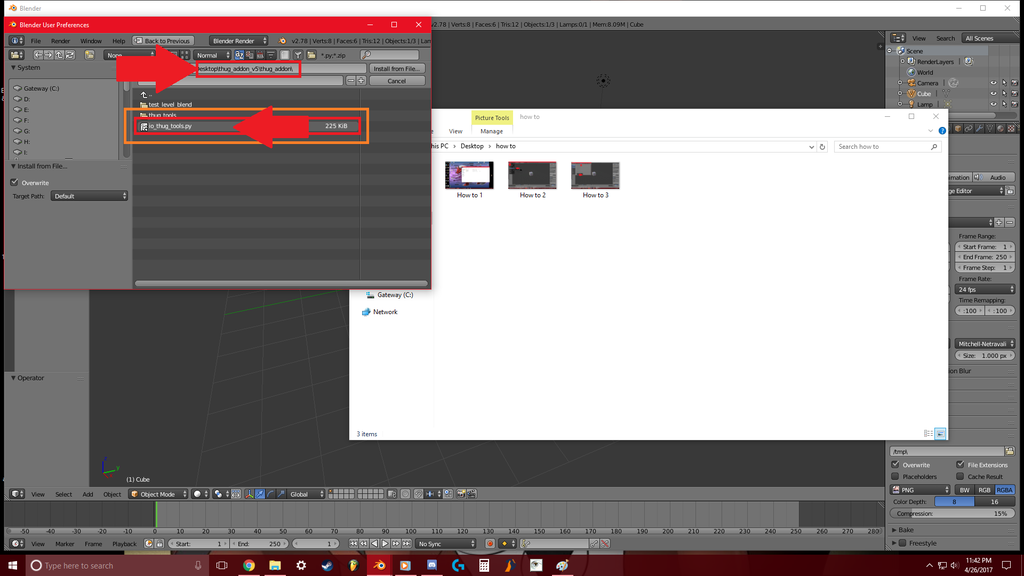
Next tool you will need is this tool. if you haven't already downloaded the thug tools for blender, go back up to the top and GET THOSE FILES BEFORE THIS STEP. if you haven't done so already....
This tool will help you quickly get your model into the game. (Instead of doing it the hard way.... You may end up doing it the hard way if you have a special character like my raptor skater.)
Weight_transfer_skater.blend
https://mega.nz/#!IT5C1ITZ!WN-1dcP3shOTbR7a4zqrjw_i1eXk8n11qFKKqFxhz5wNow in the words of ASDF:
To make a character model using a weight transfer blend:
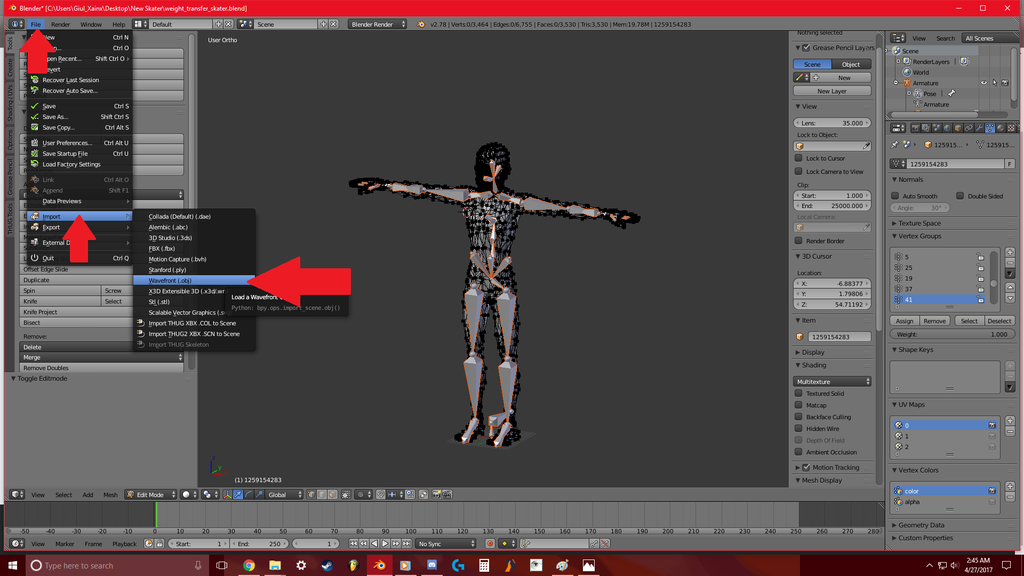
1. load the weight transfer blend
2. load your model
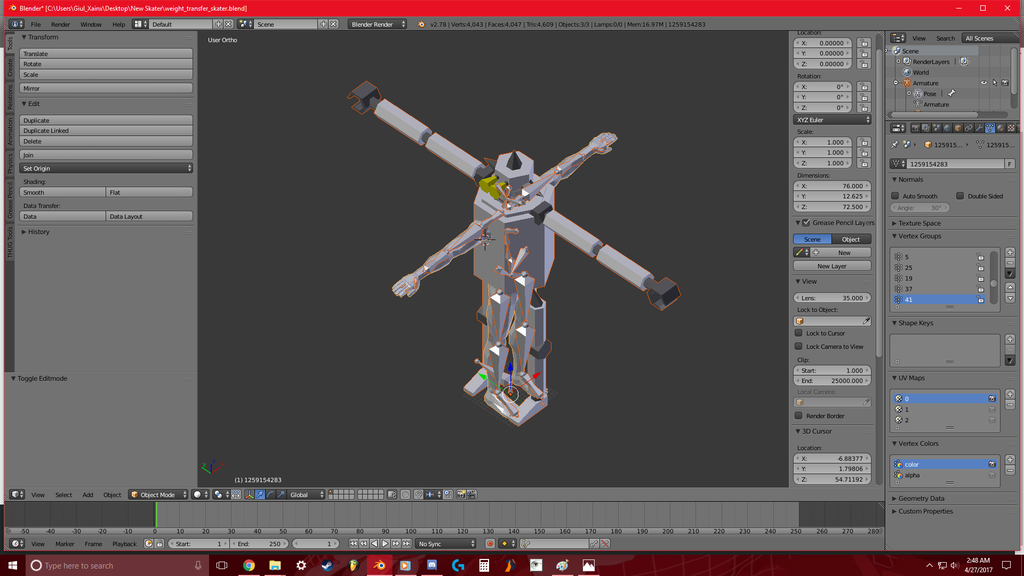
Sometimes when you port a model into this file... your model will be facing a different direction...
EASY FIX!
Just select your model and go up into the edit tools and hit "Rotate."
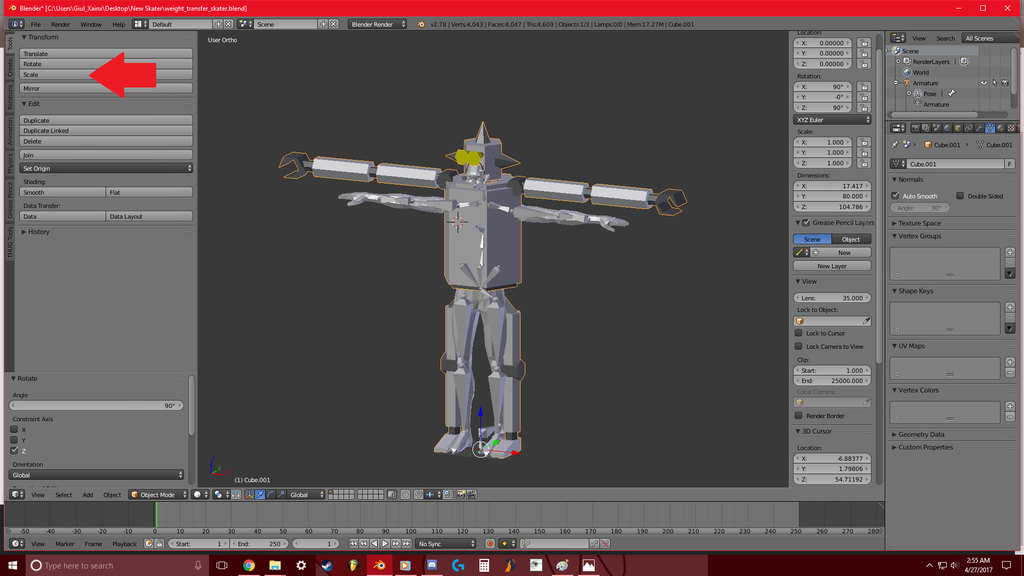
The greatest thing about 3D editors is you can quickly enter in a few things on your keyboard after you hit "rotate" and you can hit Z to rotate the entire model on its Z axis. Then you can type in a number like 45 (to turn it 1/8th) or 90 (to turn it 1/4th) or 180 (to turn it 1/2) to turn it that many DEGREES in a certain direction. if you need to quickly turn it the other way around use the - and + keys on the numpad to make it turn the same amount of degrees from its original position to the other direction.
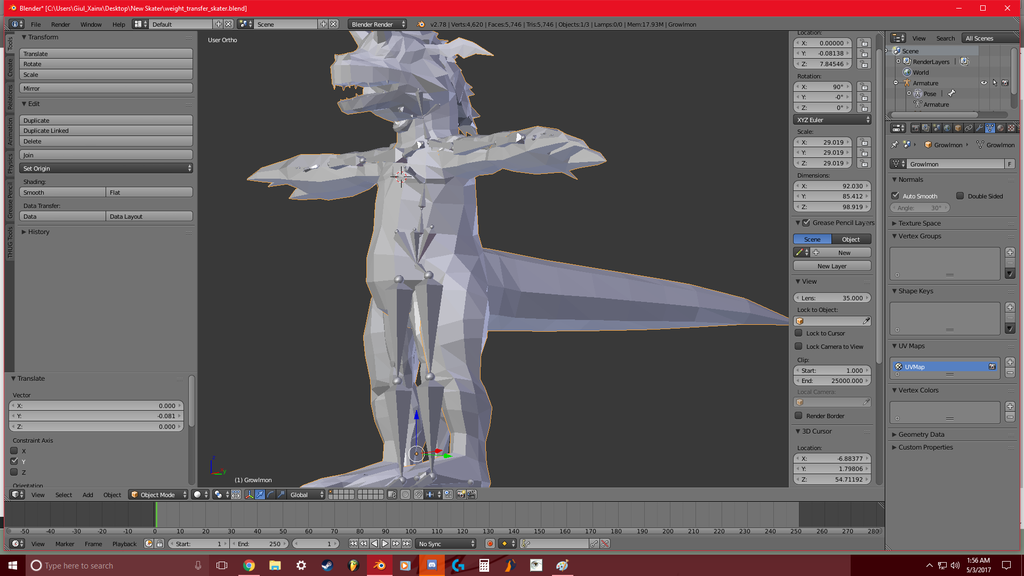
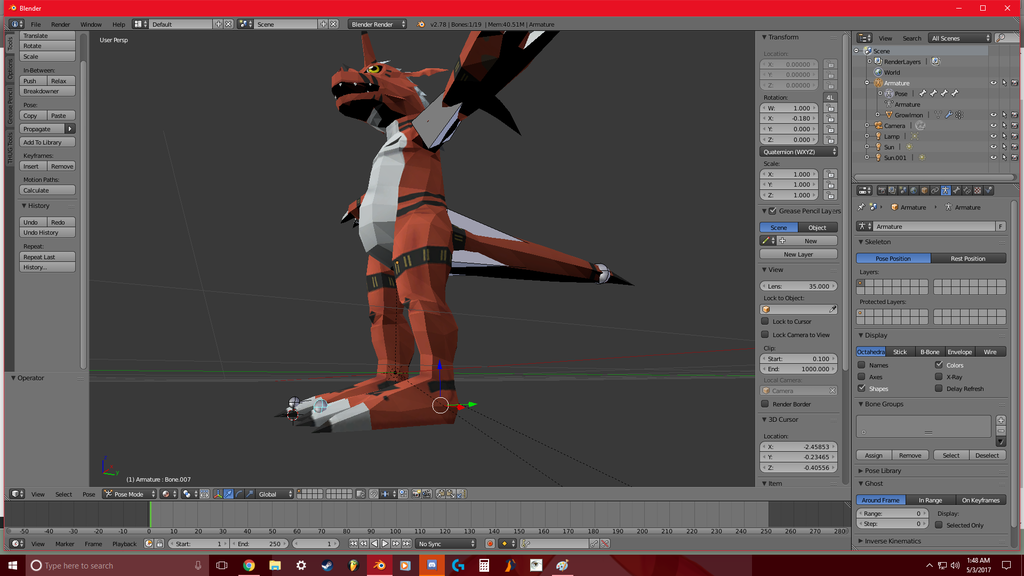
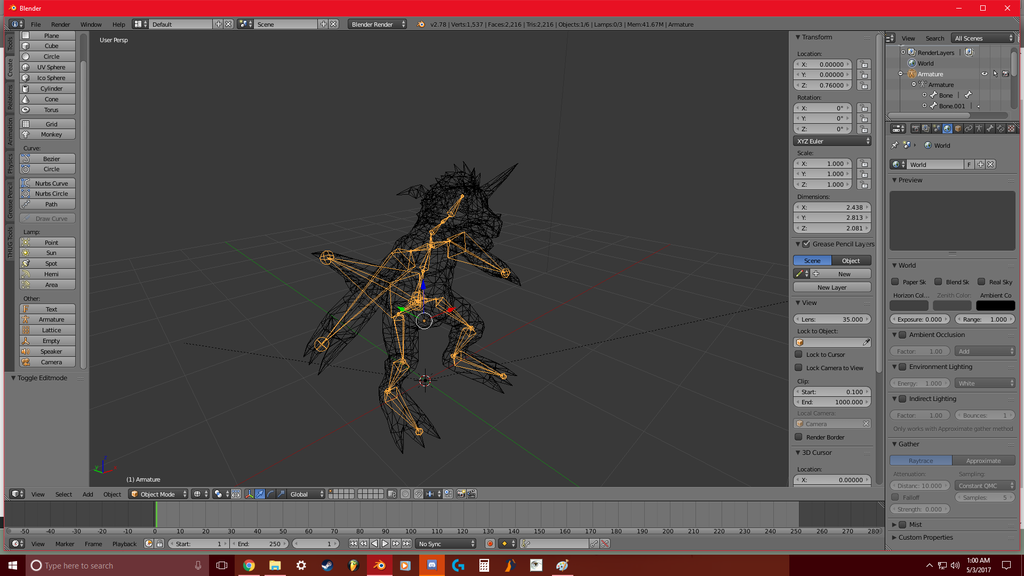
Now you can see the next problem I have with my model... it is the overall SIZE of the model... it goes outside of the skater!
You need to SCALE IT DOWN baby. It will automatically SHRINK the entire model to fit within the skater....
But in my case.... The model is not perfectly fit into the skater.... WHICH MEANS some manual edits need to be made! I will get to that in a minute.... Even if you have this problem yourself, just save it for later. Right now you need to get everything set up before you do any manual edits! So don't worry. just keep going! This is how my raptor skater model went!
3. poisition your model so that every joint in it overlaps with the joints on the source (ie the model that the weight will be transferred from) model.
4. select the target model(s) first, then the source model.
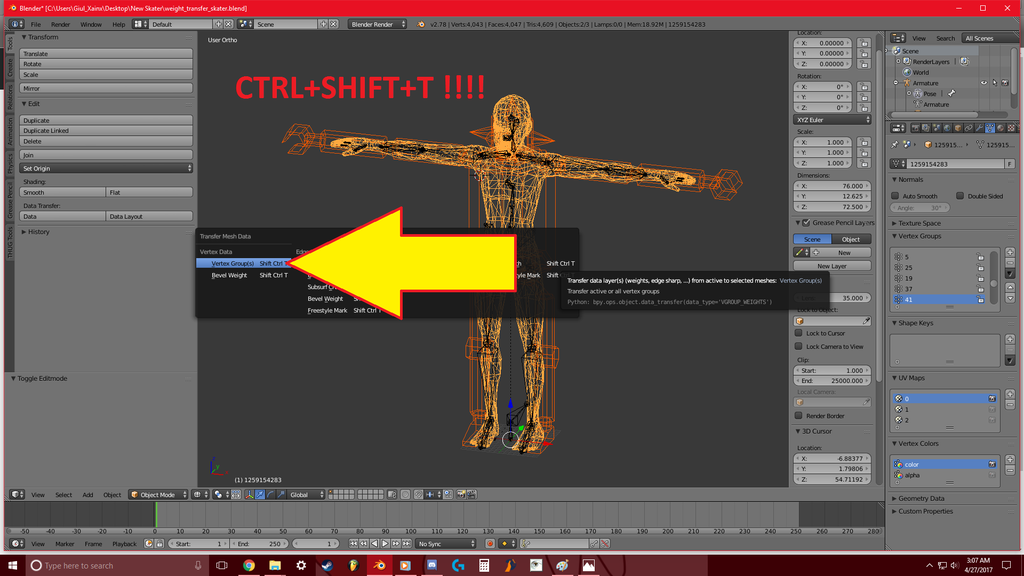
press ctrl+shift+t and select the vertex groups option.
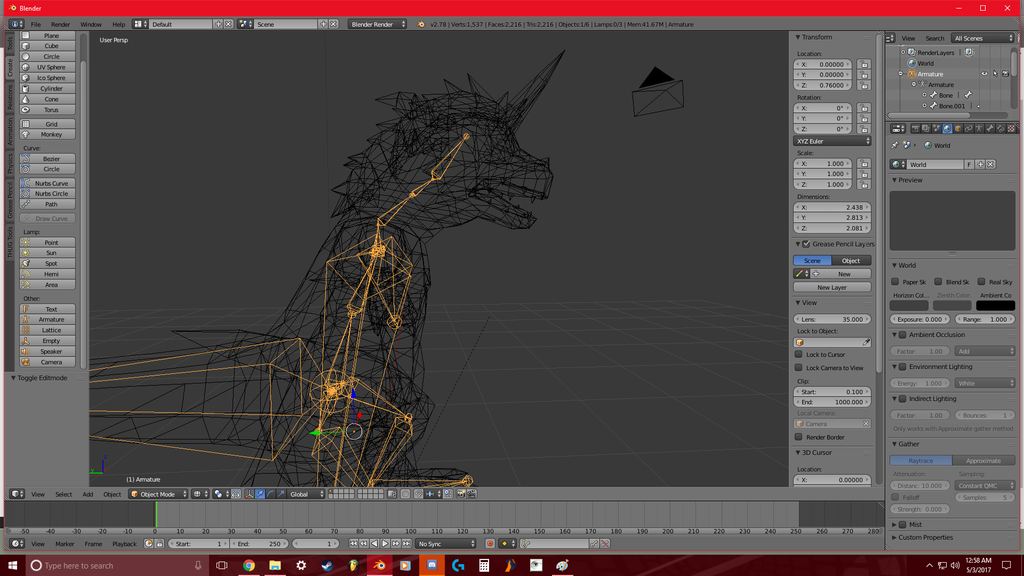
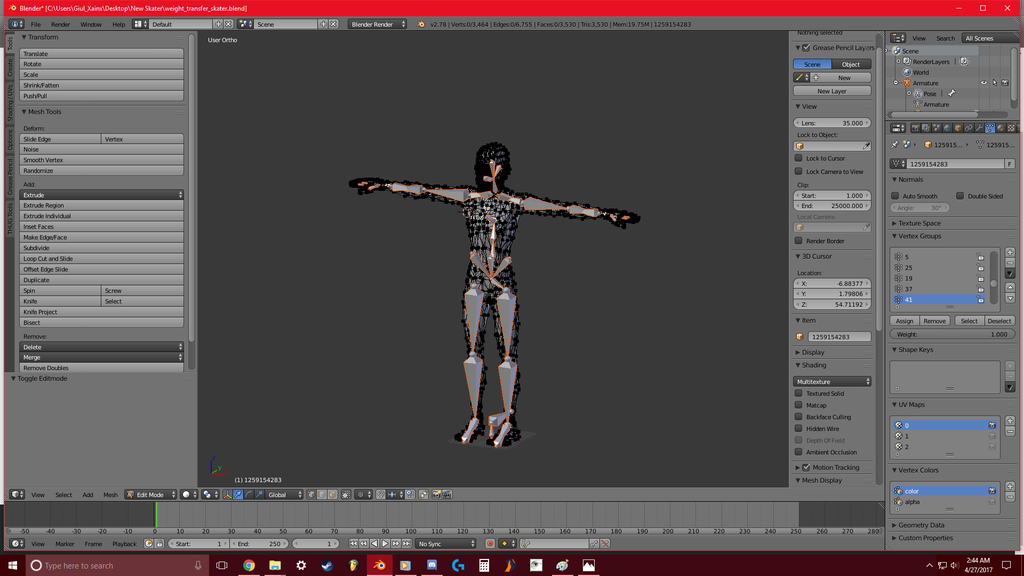
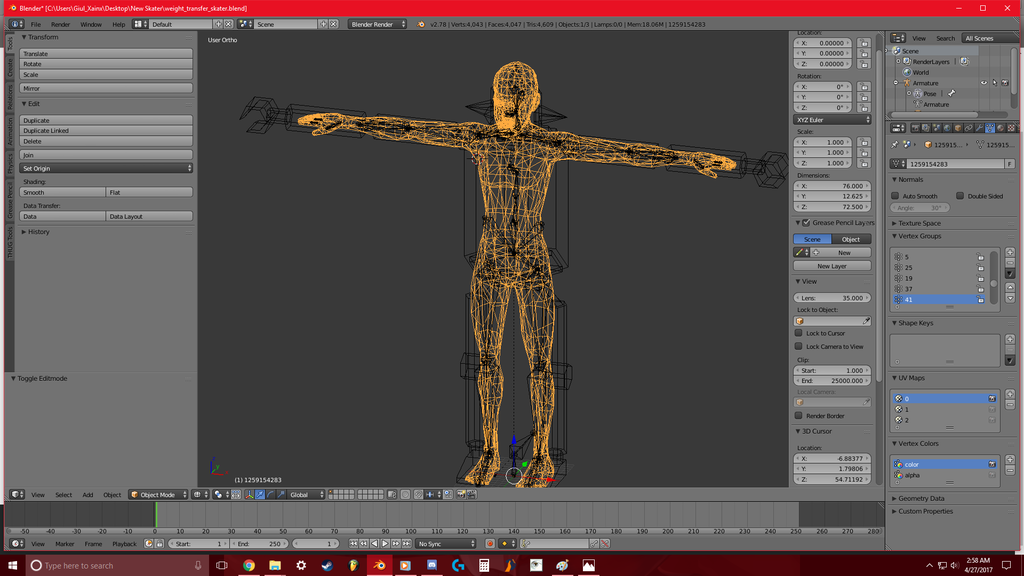
Before doing this step... I recommend going into "WIRE FRAME" mode first! (Yellow arrow shows where that mode is quickly located in EDIT MODE.
The target model (red in my picture) is the model you created/going to port. The source model (Yellow vertices) is the model that needs to be selected second. its that bald dude you saw at the beginning.

Now the CTRL+SHIFT+T and vertex groups function!
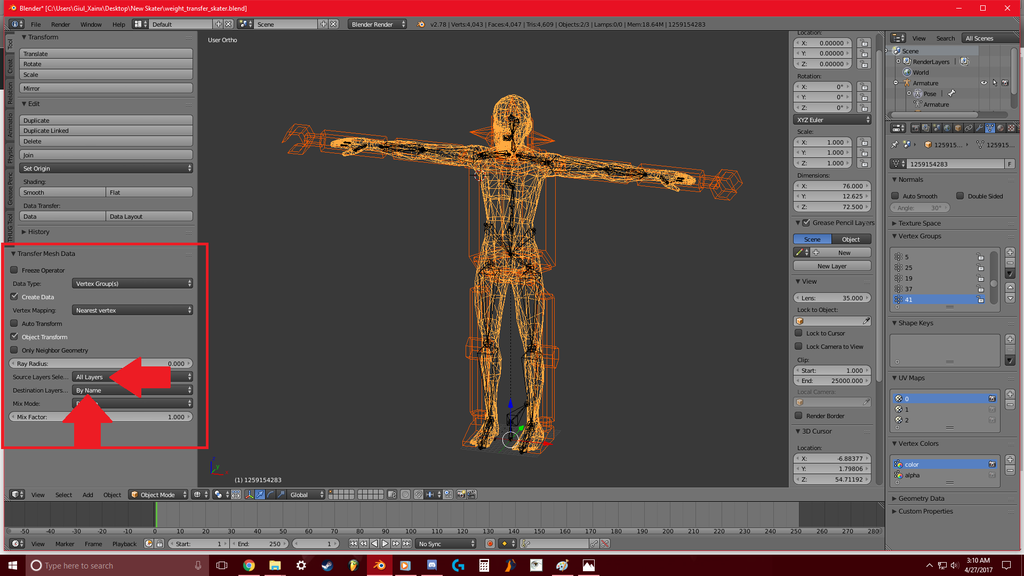
in the operator settings set source layers selection to ALL LAYERS and destination layers to BY NAME
5. if you have done the above correctly you a bunch of vertex groups should appear in your character models vertex groups tab.
before you go any further... you need to delete the source model now. BUT BEFORE YOU SAVE ANYTHING>> Make sure you save this as a new blender file!!!!!!! Make sure to add "weighted" into the blender file for fast reference!
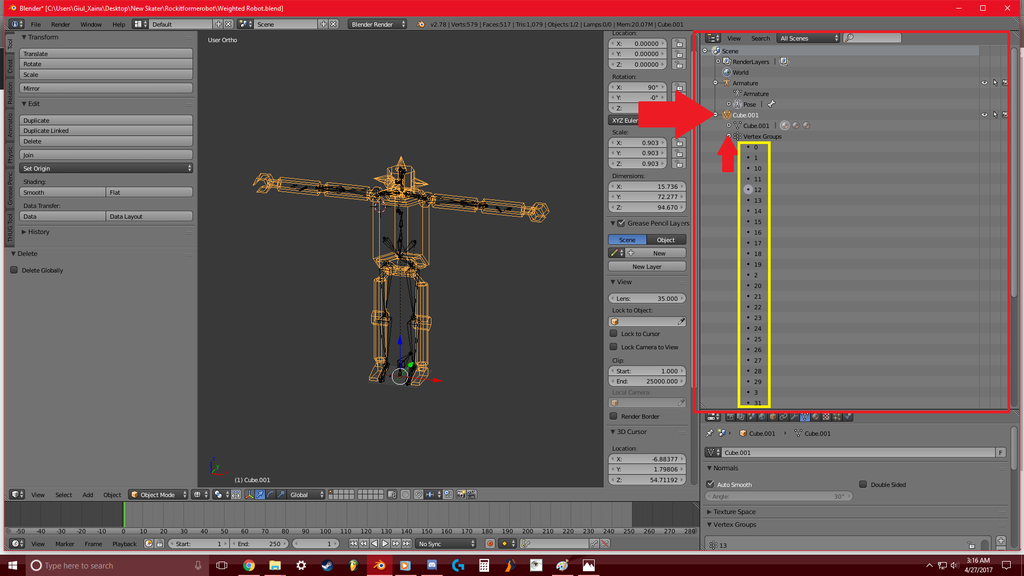
This shows you if your model now has the vertex groups. if they don't have numbers 1 through 50.... or is it 49? I don't know. but make sure in the vertex groups it has most, if not all of the vertex groups from 1 to 50.... I am not sure if it is 50 total. And there might be a few vertex groups MISSING. but that is NORMAL. For my raptor skater; I don't think I ever used group 3... or 13... or one of those numbers. Just make sure they have the vertex groups!
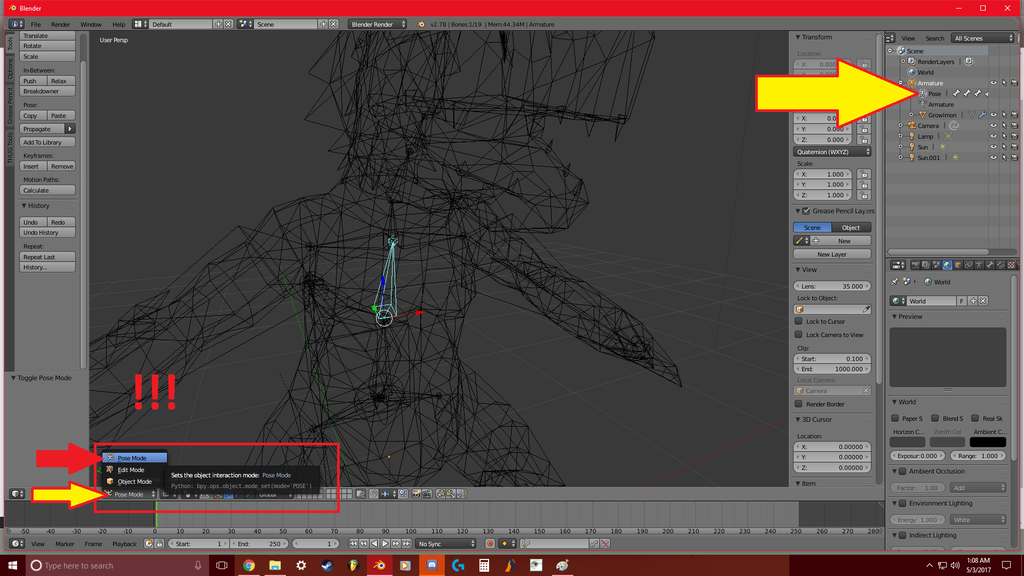
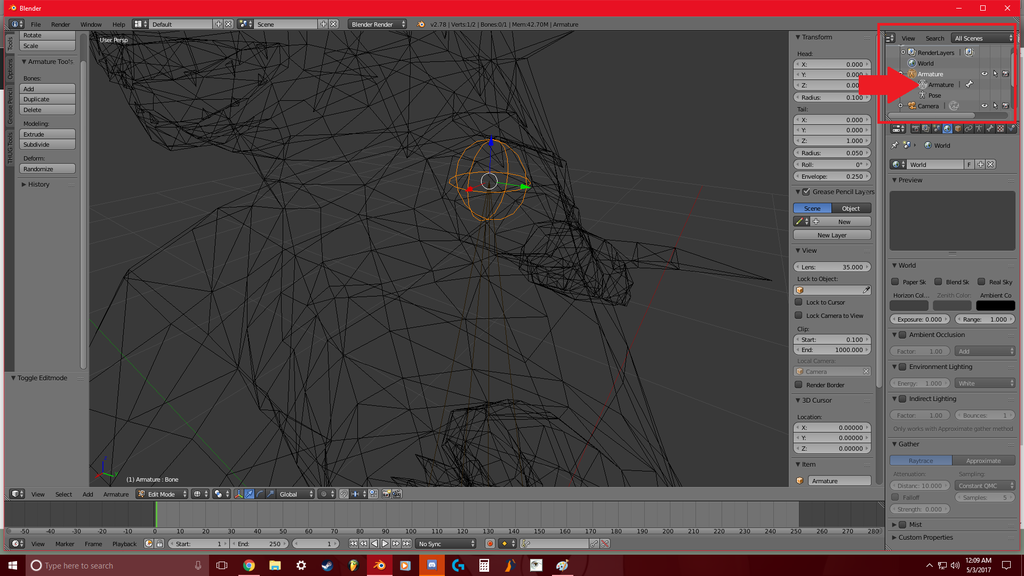
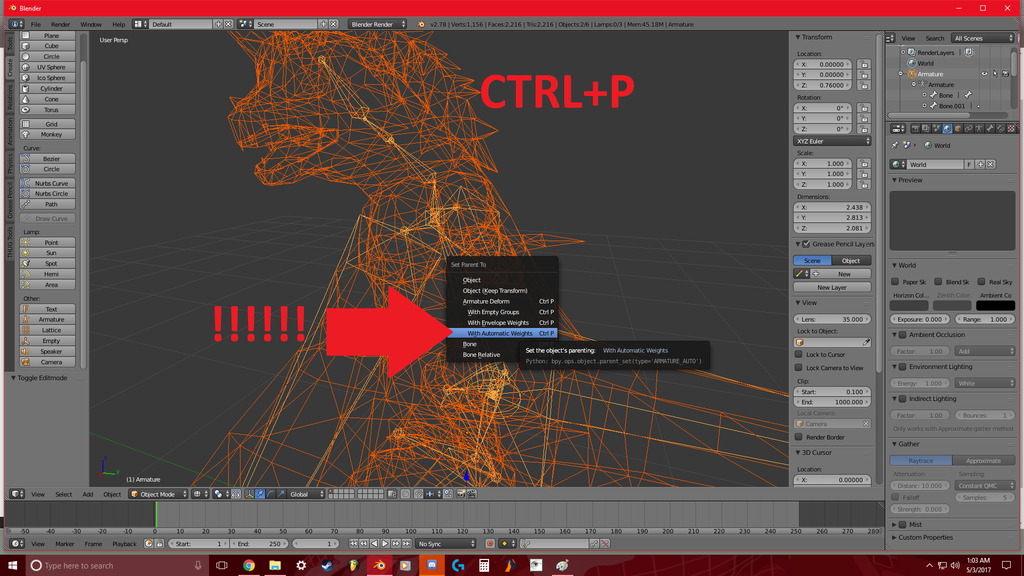
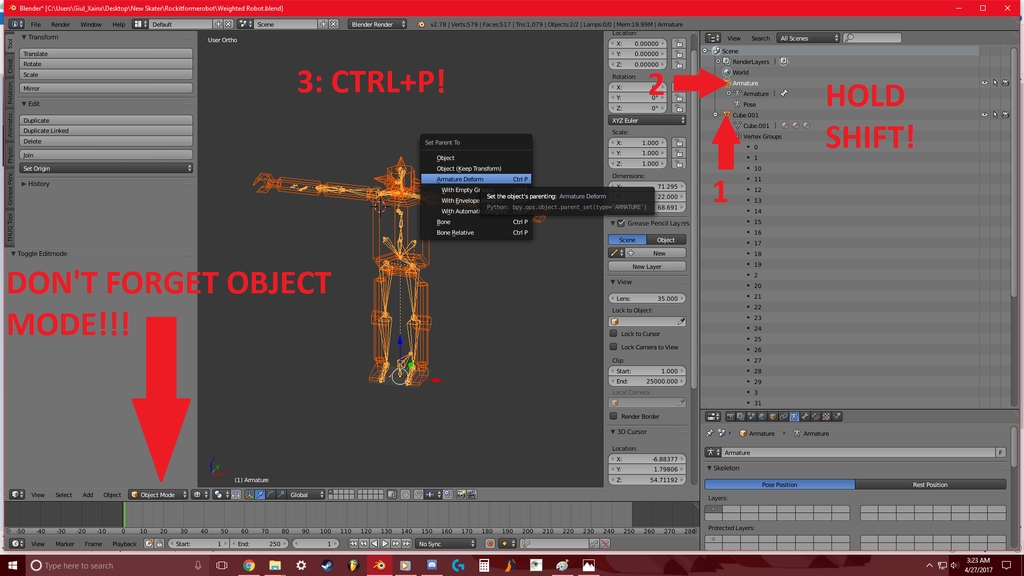
6. in object mode, select your model, then the armature. press ctrl-p and select armature deform.
So staying in the wire frame mode.... you need to select your bad ass skater model FIRST. And THEN THE ARMATURE. Which to make it VERY EASY for you... just click these in the menu on the right hand side in this order, and then hit CTRL+P.
MAKE SURE IT LOOKS LIKE THIS BEFORE HITTING CTRL+P! If you don't see the armature as full yellow... you need to do it over again. So CTRL+Z if you did not do it correctly and try it again.
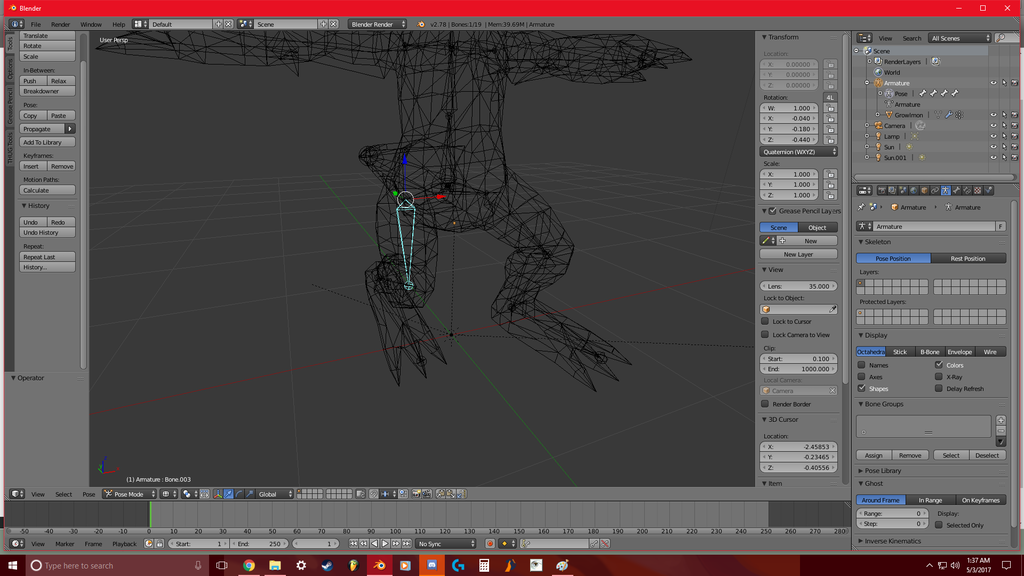
7. if you set the armature to pose mode, then switch your model to weight paint mode, you should see the weights for each the selected bone. the polys around the bone should be red.
8. you can paint over the weights if any look incorrect.
9. while in weight paint mode on your model switch to tools tab on the left (if you can't see the tools panel it can be toggled with T). in the weight tools tab press limit total, and set the limit to 3 for all groups. then press normalize all, again for all groups. uncheck lock active.
Now I have a problem with this.... Only because all of my models have parts that extend WAY BEYOND those vertex groups and bones (Those arrow like ball things you see.) So I edit them MANUALLY.
So I am going to cut it here before we hit the lovely export button.
*! BUT CON-SEPT! JUST HIT EXPORT BRUH! YOU DONE NIGGA!*
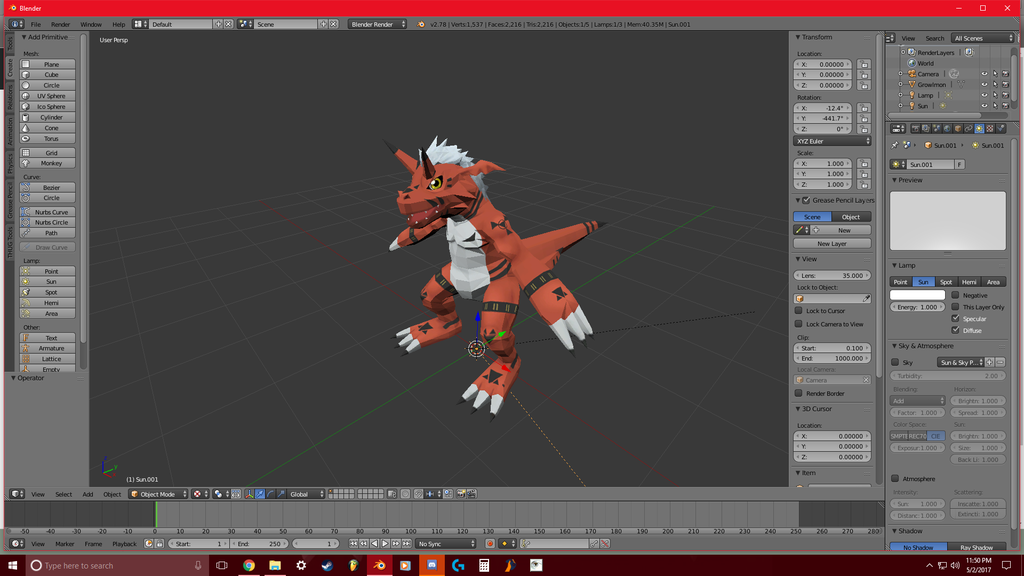
NO I AM NOT! And just to show you what happens when you export it how it is right now.... Here it is in THUG pro if you just hit export now and don't manually edit the vertex groups:
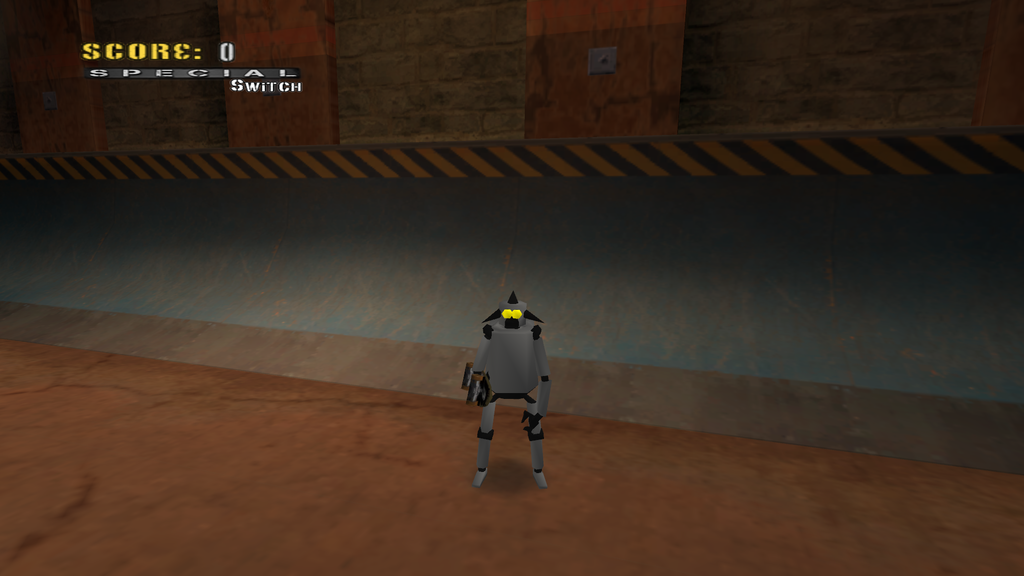
notice how he looks SAD? Probably because his ears.... or cones... are malformed...
And when the skater runs... he has all sorts of malfunctions in the vertices....
SO we need to edit the vertex groups MANUALLY!
SO! back to blender!
What you need to do, to make sure your custom skater looks AWESOME no matter what he does... you need to make sure each vertex group is assigned properly.
SO. Open up a new blender window, and put it side by side with your weighted skater file opened in blender.
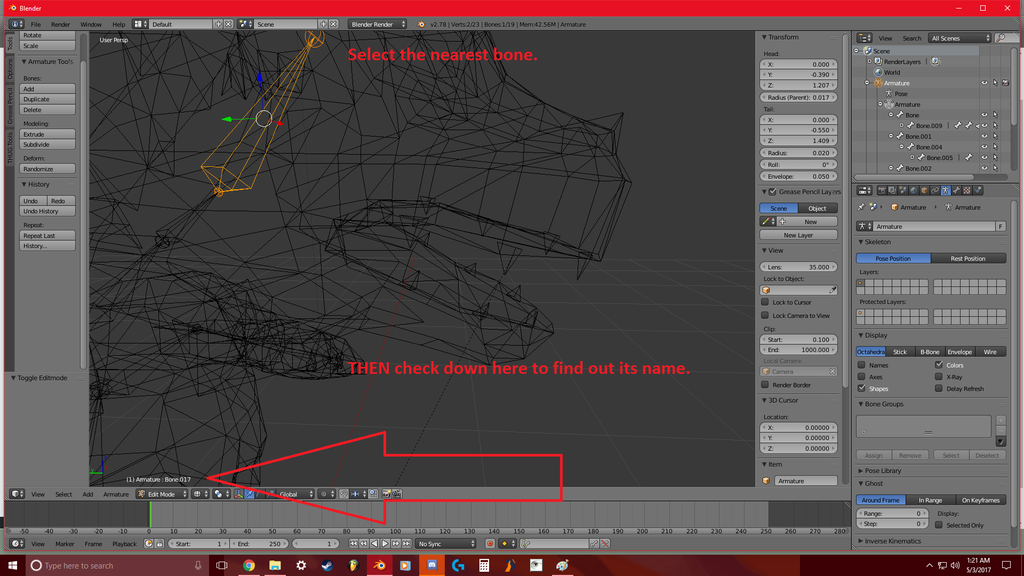
you need to check every single vertex group and align it with the vertex groups found on the source model.
it is a bit of a PAIN IN THE ASS! but it needs to be done!
Here is a photo to show you how to do it. And make sure you do it like this for every vertex group. Mimick them!
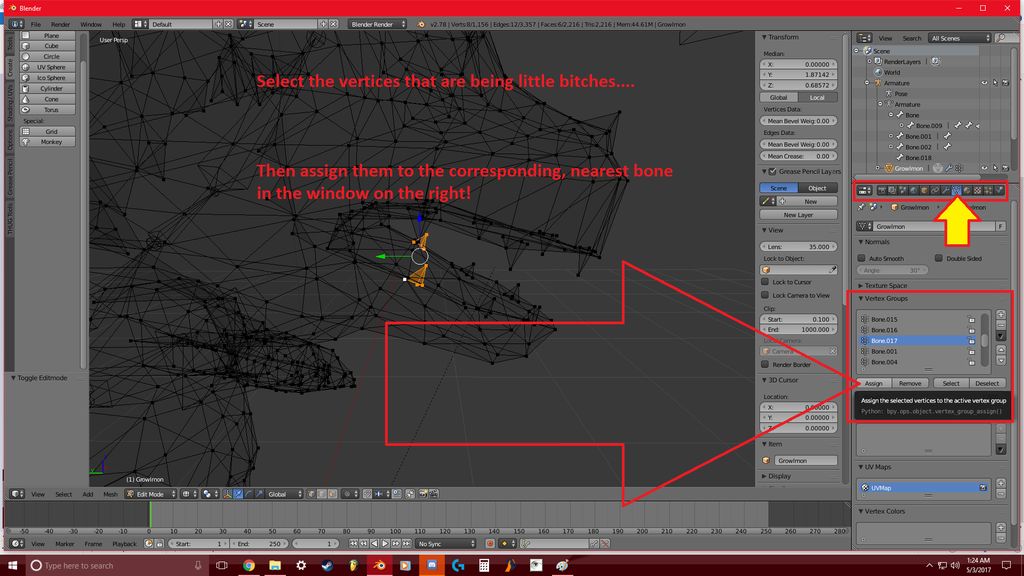
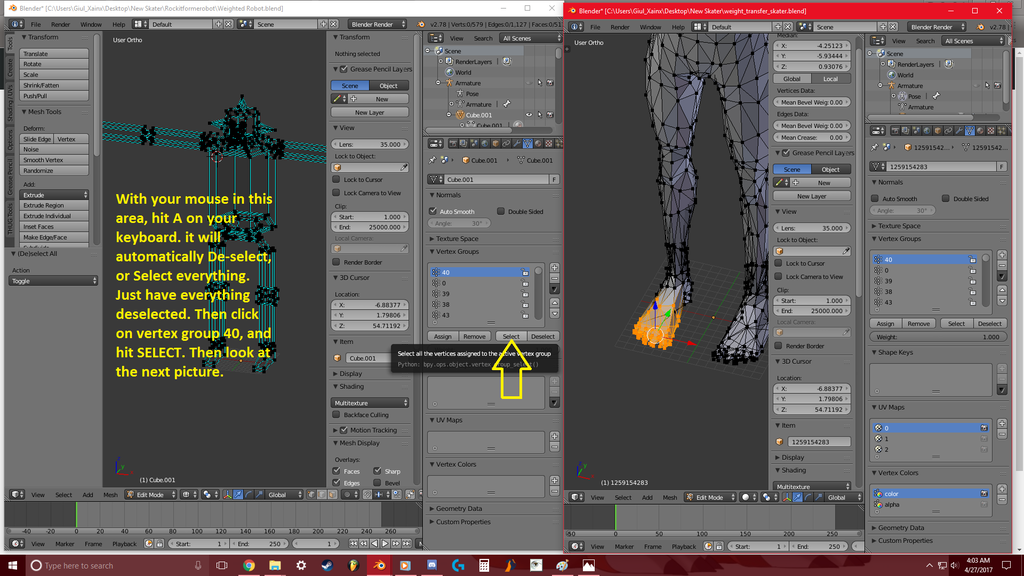
In your skater file you need to go to this area first! It is the box below the other box on the right hand side. Click in the areas, after selecting your model in edit mode, to quickly select and deselect certain vertex groups.
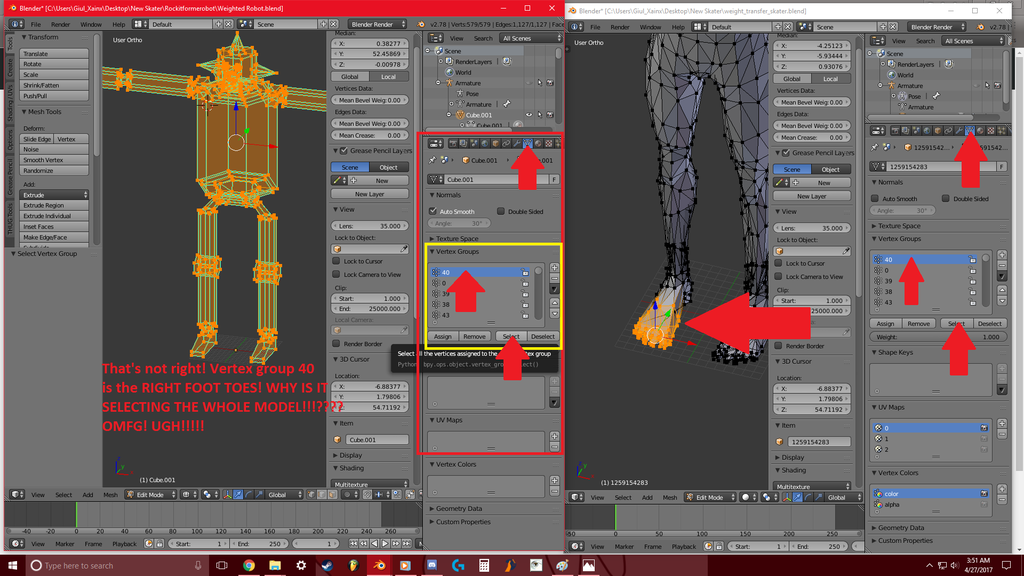
using both blender windows, you can quickly SELECT certain vertices and set them manually like so:
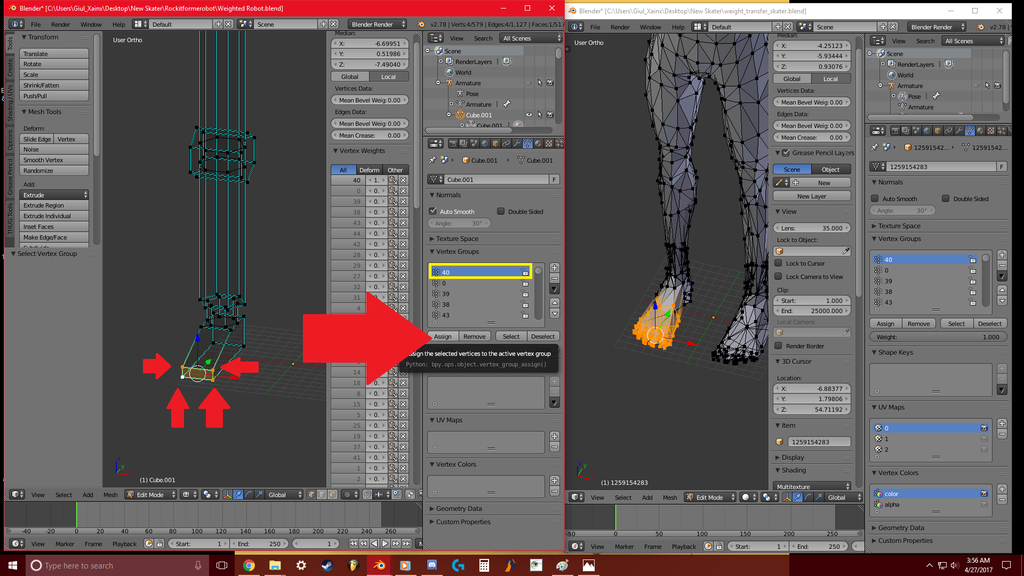
Then make sure to remove the other vertices from the group by hitting CTRL+I to invert your selection. Then hit Remove from active vertex group.
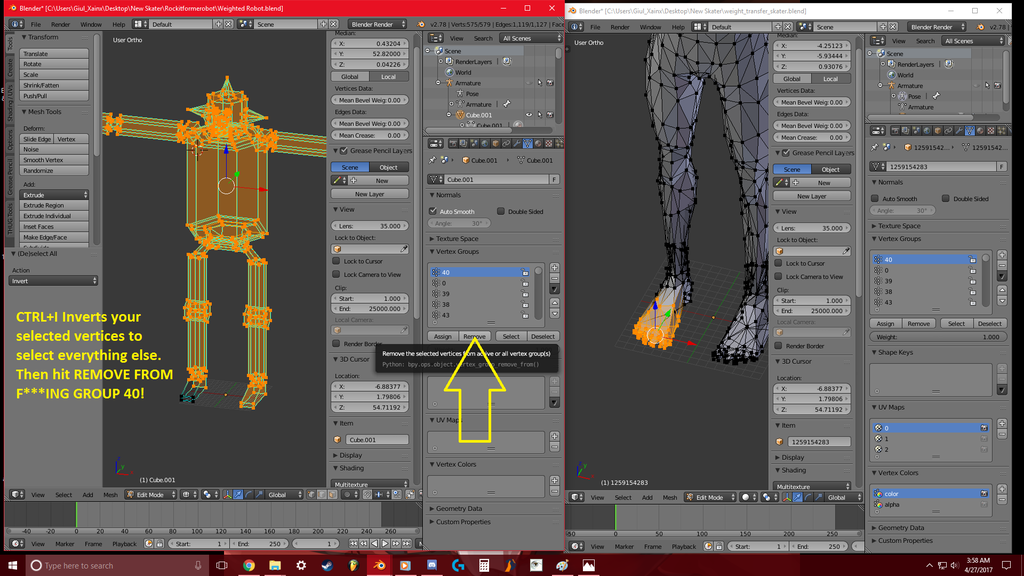
Then you need to re-select vertex group 40, and remove these vertices from every other group. There is a very fast way to do this as shown in the next picture.
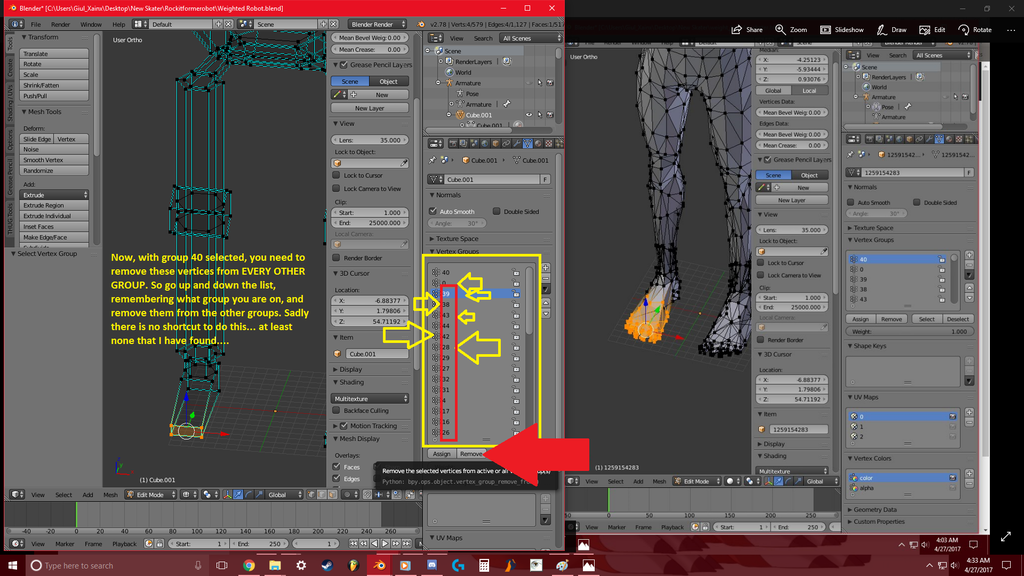
Repeat this process until all of the vertex groups are properly assigned. otherwise your skater is going to be another monster from the glob lagoon. or the spiked lagoon....
Also... some vertex groups overlap other vertex groups. I forgot to do this on this model, but it turned out fine. Just remember which vertex group overlaps which.
If done correctly, click on a vertex and in the yellow box... you should see a list of weights that are applied to certain vertex groups.... If there is only 1 in that yellow box it was done correctly. If you see a list of all 40.... you missed a vertex.
Honestly I remove each group from all of the other groups to MAKE SURE it isn't assigned to anything else. vertex group 0 isn't even needed. but for what ever reason it selects a bunch of vertices on the model in the skater file.... when my raptor skater doesn't have anything set to vertex group 0.
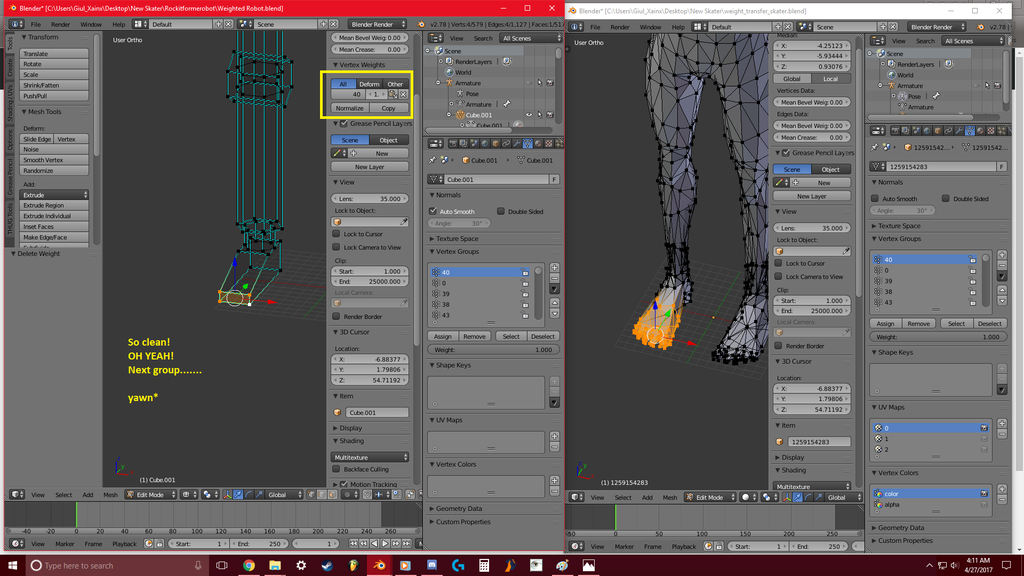
NOW after all of the vertex groups have been PROPERLY assigned....
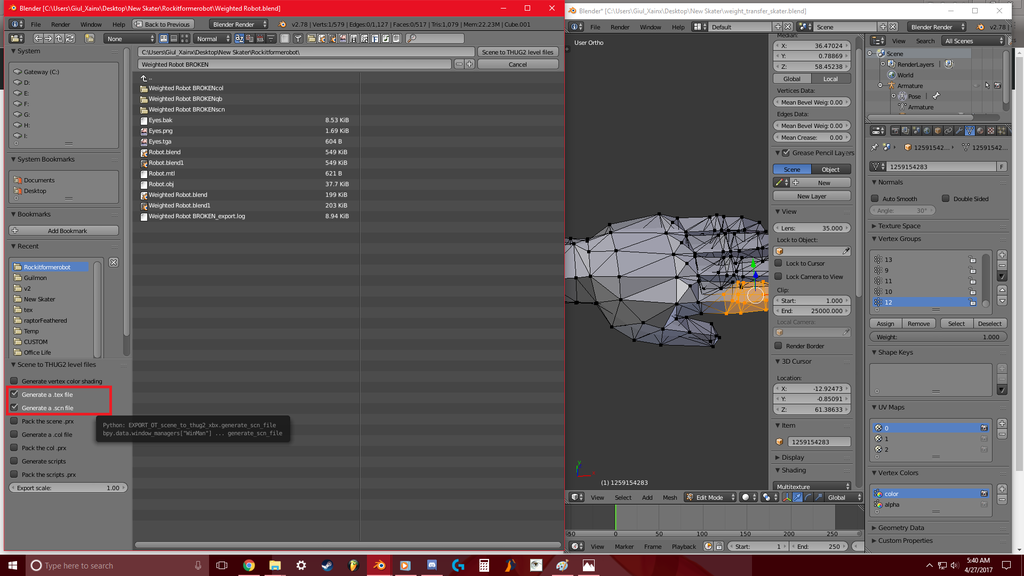
10. if you have done the above correctly the model should be good to export. export the model as thug 2 level files. uncheck everything except for the generate .tex and .scn file options. the produced .scn is the .skin file.
OMFG... a small project to help others turned into my whole night being given away...
OK now the FINAL PART! Which.... is in the read me part for you to understand how to get a skater imported. F*** it. just copy pasta.....
This Read me file is for people who have multiple custom skaters. As well as first timers.
To install RockitformeROBOT skater you must backup \Activision\Tony Hawk's Underground 2\Game\Data\Pre\skaterparts_temp.prx <<<< first.
(save it in a folder on your desktop marked THUG2 original files)
THEN DELETE that file from the folder. (it is the only way it will work.)
Copy and paste the file with the same name located in this folder into the game folder.
(This allows reading the file in the folder versus the encoded ultra hidden files.)
Next, go to \Activision\Tony Hawk's Underground 2\Game\Data\models\Skater_Secret
Pick a skater to replace and do the following:
Make a backup of the secret skater's SKIN and TEX files
For example:
Skater_COD.skin.xbx <
Skater_COD.tex.xbx <
Save them in your THUG 2 original files folder. (JUST DO IT! you'll regret it later if it kills your game!)
DO NOT DELETE THEM YET!
Copy both of the "Weighted Robot" files into this directory first!
Right click on a secret skater's "SKIN" file and hit rename, Then copy all of the text before the .xbx
Now delete the ".skin" file. (Do not delete the .tex file yet.)
Now right click on the "Weighted Robot.blend.scn.xbx" file, hit rename, and paste the text copied from the skin file into the name of this file. Hit enter.
Now do the same with the secret skaters .tex file. Copy the text, then delete the secret skater .tex file, then paste the name of that file into Weighted Robot.blend.tex.xbx
If you do this while in game, you have to quit to the main menu, or if in the main menu, go into a level, then quit back out to the main menu to see changes take effect.
Enjoy this flat colored robot skater!
YAAAAY. Now that you understand what it takes to import a skater... you can spend the next 8 hours doing this!
Remember.... you could be lazy... and end up with another creature from the black lagoon. if you really want those awesome looking custom characters... YOU GOTTA PUT FORTH THE EFFORT TO MAKE SURE IT IS AWESOME!
The raptor skater took me two days to complete because I was trying to be lazy about it. Then I figured it out... and the rest was C A K E baby.