Show Posts

This section allows you to view all posts made by this member. Note that you can only see posts made in areas you currently have access to.


Topics - The_Con-Sept

Pages: 1
1
General THPS(X) / Long time no talk
« on: October 21, 2018, 10:33:23 pm »
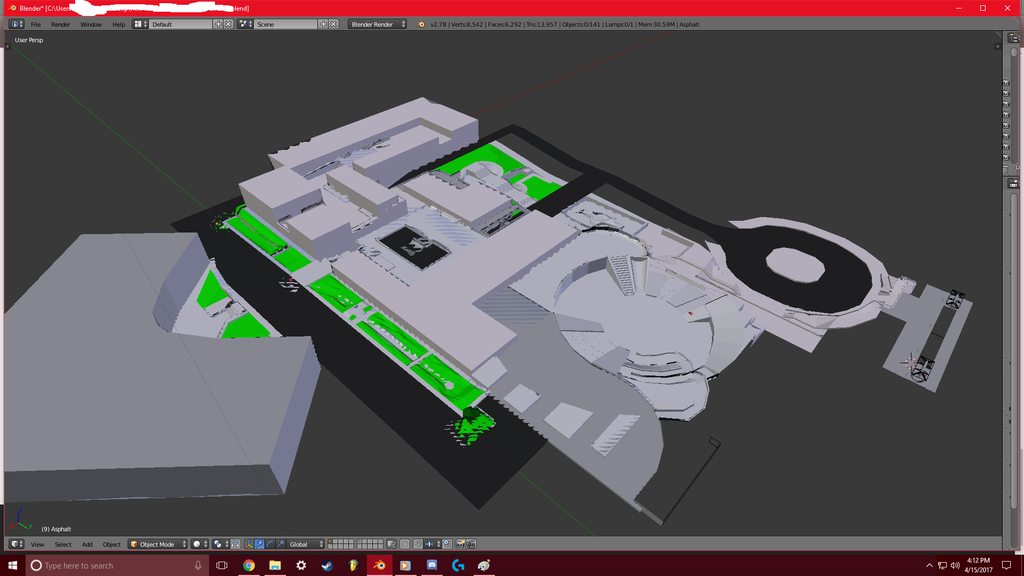
I know I sort of left this scene a while ago. I was creating a level for THUG pro but I quit in the middle of developing it because some things took off.

First off I would like to mention that I now have become the General manager of the store I work at. So now my life = my store.

I wanted to make a full level for thug pro but I guess I lost interest in it.

I now have a much better computer to do things with but I am wondering if anyone has seen this yet:

https://gfycat.com/TintedPitifulAustralianfreshwatercrocodile

This user claims he is making his own skating game similar to the tony hawk franchise. And it looks like it works the same way too. Of course he is still making this game happen but I am wondering if they will be launching this on steam.

This got me back to thinking about coming back here but I just don't have as much time as I used to. Back two years ago I was working 40 hours a week. but  now I am forever set on 50 hours a week. And it seems like I will never ever have a day off for the rest of my life. I am always solving problems here and I know I am at least a good level designer. but I have not been able to even create a single music track in over a year!

I have no time. But I wanted to check up on everything here and I noticed that you are still alive, I just have more money than time now to devote to even begin making levels.

I was wondering when you guys were going to figure out how to allow larger levels to be played online with THUG Pro.

Because my level office Life will probably never make it out seeing how I just have no time. Even when I begin to play games all I have time for is to play them instead of making them now. I wish I could win the lottery. That way I could just devote myself to creating things instead of having to be at work 24 flippin 7.

So if you guys need funds for something let me know. I'd rather spend my money on a project worth putting into than waiting for the world to change. But only if this money is going towards creating more rather than just letting it sit in a vat so to speak.

Let me know what you guys are planning to do.  I'd love to see THUGPro come out as its own thing instead of having to rely on modifications to the engine.

I guess I miss this game so much I wish I could go back to 2002 and re live those years.

2
Alright... so you have a model that you want to import into THUG Pro... But the model is not in a T-Pose.... And it doesn't have an Armature. (the number one thing used to quickly manipulate object vertices on the fly.) if your model has an Armature, or Bones, then skip to the next Phase.

if you don't know what an armature is? Then start below here.

PHASE 1
=============================================

So. You have Blender. (The version I am using is Blender V2.78C.)

Open it up.

And I am assuming you know how to import objects....

So go ahead and import the object and have it sitting in front of you. If it has multiple objects (because of hair physics/ back pack/ awesome looking hat) That is just fine. You will still be able to move them in the armature correctly. Just know that how ever you deform the model, it might mess up because some vertices may be connected to the wrong bone. And I will show you how to fix that.


So everyone knows I like importing hard to do skaters. (Mainly dinosaurs, Digimon, Weird stuff.)

So today I am showing you how to get a Growlmon model that is not in a T-Pose, into a T-Pose!


Look at this! This one looks difficult! Holy **** Con-Sept! How long will this one take you????


Not long at all actually. It takes me longer to create these tutorials than to do things myself.

So. GO INTO WIRE FRAME MODE!

(Side note... Sometimes your model may appear to have no eyes... or UV maps messed up... Sometimes they are actually hidden behind eyelids, or something like that of the sort. So different game engines use different methods of blinking or movement... You might want to check your model in Material mode just to make sure everything looks ok.)

First before we begin... Almost every single model that I come across has several "duplicated vertices" sitting on top of each other. So hit A on your keyboard and have all of the vertices selected. Then hit Space bar and type in "Remove doubles," and then hit enter. On the top it should say "Removed X amount of vertices"

Then you need to add your first bone. I recommend starting with the spine (Middle of entire skater) so that you can quickly get a good sense of how models are rigged up to be animated.

What you want to do is try your best to position this bone in the absolute center of all of the vertices inside of your model.

So create a bone by selecting your model (make sure it is yellow) and go into the create bar on the left and hit the little option that says "Armature."


"OMG Con-Sept! I am reporting you for posting NSFW content!"


Relax... you have to move that bone up into the spine..... (hahahahahaha!)

"god daamit consept.. you just made it XXX rated...."

Ok. You do that by editing it's current location in the transformation box. - (if you are not seeing that little panel on the right side, look for a little tiny + Sign located in the 3D plane space window along the edge of the right side. You should click that little plus to bring it up.)

In the next picture I don't have a red box to help you locate it, but you can see it on the right side... Just edit its Z value upward.

(Sometimes you might not have a model that is sitting at an XYZ value of 0,0.0 So you need to just move the bone into the correct place. That is why selecting your model first, and then selecting the add armature button makes it quicker to get that bone right in the middle.)


Now we have the next problem where people might get stuck....

The bone is TOO BIG and NOT AT THE RIGHT ANGLE..... (God dammit Con-Sept.... why are you narrating a gay porno?)

So we need to get it corrected in two ways. First we need to SIZE IT DOWN.... Do so by selecting the armature object string located in the top right window and select the bone itself. You should see the armature suddenly select a spherical little object like so:


Now when you look at the object transform panel on the right, it says THE HEAD... and the tail.... If you move one value and it doesn't move the sphere you have selected, then try moving the other one. Both of them can be quickly manipulated this way.

Now when moving the little spheres inside of the mesh please keep in mind all of the other bones you may need to extrude from either side to connect the hips, the legs, the arms... the neck... the head... ALL of those bones.... So here I have it set up so I can quickly  extrude the leg bones, and the tail bone. And I don't have to mess with too many other settings.


Always make sure you have a good location for your next extruded bone.


As explained in the picture, edit one side of one bone for the left... or the right if you are like that... Then just copy certain X, Y, or Z values to quickly mirror the other bone. A lot of other people like to have a mirror effect happen when they extrude. but sometimes you may actually come across a different problem where the model isn't exactly at perfect angle. maybe the pose is that of a statue... So that means your rigging will be harder. But I am a bit masochistic. I like hard things. This model I consider to be intermediate. Give me a challenge! hahahahaha!

And besides, sometimes doing things with the mirror effect might create some interesting unexplained artifacts or extra bones. Or sometimes makes it disjointed. So I do everything by hand.


Now this is where things can get very interesting later on. This model has a bit of a twist to it. a 45 degree angle twist to it. It may cause a problem later on, but for now I am going to ignore that. We just need to get the bones in place.


When it comes to Growlmon's feet, he has toes that stick WAY out... And they sort of fan out as well. Just make the bone go a little bit outside of the model's base foot. but not too far. if you have a model like this growlmon you don't have to make a bone for each toe. Just skip that... We will get to it in a minute.

Get the rest of the model rigged up and have it look like this first. And make sure the bones are inside of the model.


When it comes to growlmon's head... it is hunched over his body.... Notice how there are a few extra bones in his neck? That is because I need to straighten him out a bit in the neck in order for this to work... Otherwise he will be looking upwards when I get him into the T-Pose. Just sort of think about how levers work when they have something covering them that stay in a certain position.


Now that your model has an armature structure inside of him... It is now time to do what ASDF said in the other tutorial... Which is Step 6.

Quote
6. in object mode, select your model, then the armature. press ctrl-p and select armature deform.

Now since we are not doing a weight transfer to a skater model yet, we actually have to do something different here. When the menu box opens we actually need to add vertices to certain groups for the bones to manipulate. So instead we select:  Armature Deform->WITH Automatic Weights!


Now we go onto the next phase....

3
Questions & Tutorials / Custom Skaters: From blender to THUG 2
« on: April 27, 2017, 08:05:48 am »
So you have a custom skater, but you don't know how to port it over to THUG 1 or 2 right?

We would love to see more custom skaters in the game, but not a whole lot of people know how to do so. And this is something anyone can learn in a matter of days. Sometimes hours if you are a fast learner and can remember shortcuts.

Let us start with the basics. And please read this all the way through!

===============================
CREATING YOUR SKATER!

Step 1. Download and install blender. (Current version I am using is V 2.78c) https://www.blender.org/
Step 1.a: if you have never used 3D plane editing software before I strongly advise you to look up some introduction tutorials on youtube:
https://www.youtube.com/results?search_query=Blender+introduction+tutorial

Once you are able to figure out how to use the software move onto the next step.

Step 2. Before we begin you need the thug tools plugin for blender.

In Sk8ace's post here: http://thpsx.com/forums/index.php?topic=461.0 you should find a python script add on for thug pro.

it should be the latest updated file. At least Sk8ace tries to keep it updated with the correct tools.
So download these three files one at a time and export them to your dektop:
Quote
Sk8ace:
...

Blender Thug1/2/Pro Plugin by asdf
https://mega.nz/#!hc5iUIZS!0B5zsHHZEU2dRfa5iiGsmZ1UhXfJKv_OHNH9eFZmJBE

Updated Blender Python Script by asdf
https://mega.nz/#!VNJikB6Z!FE4mbytJGXrSGIAYG3jNwNJ3qoO-Pauv2Yoqg14lGHA

...


Step 2.a

Open up blender, DO NOT DELETE ANYTHING YET, and do the following:

Got to File and select "User preferences"


Then go to "Add-ons" and towards the bottom of that window it should say "Install from file"


Then navigate to where the thug tools are and select the "io_thug_tools.py" file.


And I know I did not have a red arrow of what you are supposed to hit next, but in this same window there is a button that says "Install from file." hit that button on this screen. It is on the right hand side of the small window pop up after you hit the file location.

If done correctly what you should see in blender now is a new tab in the tool selection bay that says "Thug tools."

Now real quick select the cube in the 3d plane space and click on thug tools. (if you didn't watch any youtube blender tutorial videos... you will be lost at this point!)

Just as practice you need to remember to split your faces automatically upon export. Doing this now will save you from crashing your computer. never have any number of faces, PER OBJECT, above 300 faces. If you watched enough tutorial videos on how to split objects from one to create a new object, it will be a snap to figure out what this means. And yes you can have more than one object as a complete skater in THUG. My raptor character had its wings and mohawk are separated from the character's vertices as a new object.


Just remember that each and every object you create will have "split faces upon export" automatically UNCHECKED. So please make it a habbit of making sure, before you export anything, that each object has that checked just as security. unless you know your objects have less than 300 faces.

Get ready for the hardest thing to do. (Hey now doing things the hard way at first is a great learning experience! But it can be one hell of a process to create a model for use in THUG pro. but if you learn how to do this now, you will be one step closer to becoming a real video game designer!)

XXX
If you already have a custom skater model ready to go, then skip the creation of your new skater and go into the next phase <<<<<<<<<<<<<<<<<<<
XXX

Step 3. GO WILD!

Create something crazy! here is something that I created: Took me about 2 hours to do so.


(Make sure your created model is in a T-POSE!)

Now at this point with your created model you are really only half way finished. next up is DRAWING!!!!!

I can hear it now: OMG Con-Sept! This is totally taking for ever already! You mean I have to actually DRAW!!!???

Well if you want your model to look ultra realistic yeah... go ahead and OPEN UP MS PAINT and start drawing!

hahahahaha! evil laughter over... if you are trying to import a famous figure, chances are they already have a model available online. Like if you want harrison ford: http://steamcommunity.com/sharedfiles/filedetails/comments/156923584

Someone has probably already created a full 3d model of that actor. So all you need to do is find its .DAE or .OBJ file online somewhere. There are a few places for you to go online and find literally MILLIONS of models!

use this site: https://www.models-resource.com/

Chances are you will find everything from famous actors, to video game models ripped straight from their video games. If they don't have the model you are looking for... well then.... MAKE ONE!


or... if you are making a model of yourself.... then all you need to do is import your face.... onto a face model.... And then... you know what? just import your face onto the skater reference file, and then edit the vertices on that reference model, and then you have yourself in the video game. only when you edit the vertices on the skater in the reference file... you can make yourself look ULTRA REALISTIC IN ULTRA HIGH RESOLUTION BY ADDING MORE FACES TO THE MODEL! (This will happen at a later time.... I just want to show people how to do stuff with a full created 3d model, or with an imported model from a huge resource site.)

So for my model... I am just going to do a flat color. And I am going to do something extra special with this model in terms of its looks mainly with the eyes since someone keeps saying "SOMEONE MAKE ME A MODEL OF THE ROBOT FROM ROCK IT FOR ME BY CARAVAN PALACE!!!!!!!!#%&*(*^%$"

(I am looking at you dude.....)

So now I am going to color it. And I am doing a flat color. Since this is a robot... I am making him simple. SO. if you want to learn how to add textures and such in blender... then search for UV mapping in Blender on youtube. and from there you should be able to quickly understand how UV maps work with image files.

BEFORE YOU USE THOSE ULTRA HIGH RESOLUTION PICTURES! YOU CAN NOT HAVE THEM AT A PICTURE SIZE HIGHER THAN:

512 Pixels by 512 pixels.

SUPER IMPORTANT TO KNOW! So please. keep the texture files SMALL! Go any higher than 512 pixels by 512 pixels will cause major lag issues in the thug pro engine and CAN KILL YOUR PC! (So please heed these words NOW! The THUG pro engine can't handle TGA files larger than these pixel specifications!)


So now after coloring the faces... and setting everything up we can move to the next PHASE....


We need to export this model, FIRST, into an object file.

(Remember to save your model before doing this! if blender fails.... there goes your model. You can try "recover last session" to see if you can retrieve your model if you forget. but chances are... you will LOSE EVERYTHING. Just accept it and try, try again.)


if everything went well... NOW IT IS TIME TO WEIGHT TRANSFER YOUR MODEL! (yay!)

==========================================

4
Create-A- / Raptor Skater
« on: April 24, 2017, 06:47:45 am »
Alright so... the raptor skater is pretty stable.

Please keep in mind that his hands aren't human so they are going to look funny with certain tricks, but they really don't stand out. At least I don't think they stick out like a literal sore thumb. But if you look closely you'll see the deformities in the hands.

On the same note as the hands is the back of this raptor skater. His back will appear to be stretching. This is because a raptor isn't supposed to be standing upright. It is supposed to be  standing hunched over itself. The only time a raptor should ever be standing up right is when it is in the middle of the air, pouncing on its prey.


FINAL NOTE! he has a stiff tail! But only because we don't know how to animate in thug pro yet.

NOW ON TO THESE SEXY PICS OF A NAKED DINO SKATING ALL OVER THE WORLD!


https://mega.nz/#!YHIWSYgQ!_3rbfpVITyGzFzWTx-bQwkCAVAbJstBkI-K7Ku5xpts

^


Splinks also made a raptor skater as well. Check out his!:


https://www.dropbox.com/s/ekaatmvezt85bd2/Raptor_pack.rar?dl=0

^^^^^^^^^^^^

5
Create-A- / My first level in BLENDER. Screenshot leaked! 04-15-2017.
« on: March 23, 2017, 05:17:56 am »


Above: First leaked image for forum users of its current progress.


Alright so I am going to be updating this post with my own level that I am going to create from scratch in blender.

Hopefully this will help others to find that it is not really that hard to do.

 :
But the way I am going about making this level is using a paper mache-like method.

A lot of people like using cubes to create levels and rooms much faster. but I am not going to be making a level with a bunch of rooms. This is going to be outdoors. My first level is going to be completely made up in my mind. I am just doing this to get a better feel for the editor. So here goes nothing... quite literally.

As I said I am using a paper mache method. Which means I will be using a lot of subdividing on a single object in blender. What I am going to accomplish first is just making several different elevated areas. That way I can build around it. Or add to it later. But first is laying out the foundation.

(Ace, is there any where on this site that I can upload this blender file as I create it? Or do I need to use a third party upload site to allow others to view my progress in blender?)


Alright... so I can't use the grid object the way I want to so I have to use A GOD DAMN CUBE. UGH.


anyway I subdivided one of its faces and made it so I can sort of create several different buildings... or in this case SQUARES, extrude up as high as I want to. but I want to create a much better testing environment, and have people understand how these values are appropriated. So... I need to create some base values and quickly go inside to test them. I am going to set different squares at different heights until I find a preset number I like. One that represents how high I need to make a wall look about 6 feet. Or enough to represent the side of a house. How high I need to make it so curbs look like curbs, or a curb you can grind on. And so on and so forth. of course I am doing this without collision brushes. it just might not work out in testing the way it should.


Alright in using this editor I can quickly figure out how I should be making levels. because right now, as I am subdividing new squares to set up a basis as to how wide a sidewalk, or street should be, it is adding grind-able lines as I do so. making it difficult to edit this stuff out and such. but I am sure I can iron this out later, or in general just build the level in gray scale first, and then start assigning shit to the objects. Either way I am now creating a test to see how big I need to make certain objects in this world. And I am going to try my best to scale them in a way of which I can quickly identify which square is the correct size. I will also be making a sort of hand rail. or at least something that represents a hand rail IN BLOCKY FORM. The blocky lego goodness!


and the first test? OMG I made a microscopic level!

I have to REDO EVERYTHING!

Alright the spoiler is the venture of something you might as well skip. In the end I messed up everything and didn't even have the correct scale. So.

Follow these steps at the very beginning. This is crucial for creating a new level.


As soon as blender loads up you need to set the scale. And to do this properly make sure your grid lines are visible.

Delete the first cube you have in front of you, and click on the eye ball icons for the camera and the lamp. They aren't needed right now.

You need to set the scale of the grid lines at 20.

In the main window, off and to the top right you should see a little + sign in black. Click it. It should bring up a whole new set of options. One of them should say "Display." In this menu you should see "Grid Floor."

Make sure it is on. You can toggle it off so you can see the difference in the main window. but make sure it is on.

Under Grid Floor you need to set the scale to 20.

Now remember that 4 of these grid floor squares are now set at the correct scale so that 4 of them put together is wide enough for a sidewalk.

And that if you fill up a 4 X 4 X 6 cube it is large enough to box in a human at average height. So now that you have a really good basis of scale, now you need to make the lines stretch out more. 100 lines.

When you make a new cube... you gotta make it to proper scale. At least the way I do it is by making sure the geo location is correct and the scale is tweaked just right.

I got to do this some more tomorrow. making my first actual level? I want to make a New mexico level. A PROPER Albuquerque level. Trust me. I know the skate spots around here. And they are going to be some pretty imaginative ones.

6
Questions & Tutorials / DS4 not working (oh god..)
« on: March 21, 2017, 05:56:44 am »
So I got a Dual Shock 4 on my old PC. I downloaded the DS4Windows tool... Got everything responding just fine in the program and on my computer. problem is? It doesn't work in thug pro. No matter what I do I can not get my DualShock 4 to work properly with THUG Pro. It just doesn't work... Is there anyone else who has a Dual Shock 4 (PS4 Controller) working with THUG pro? I have hit a dead end.

7
Whatever / BANNED!
« on: November 08, 2015, 02:04:59 am »
I didn't get banned from tony hawk but I made a post in another forum for Counter strike and apparently... Trolling is now a Ban-able offense. EVEN IF it is not directed at forum members, forum posts, or even considered ambiguous. So I got banned from one forum for talking about de-ranking in CSGO to "mess around with silvers."

8
General THPS(X) / Something to be concerned about.
« on: October 18, 2015, 08:07:23 pm »
I have heard of this agreement floating around the internet and especially on a few democratic e-mail lists that are going around. But I honestly didn't know what this agreement was until it was outlined specifically FOR US GAMERS AND MODDERS:

https://www.youtube.com/watch?v=0DIJVetzaHs

9
General THPS(X) / Tony Hawks Pretend Skater 5.
« on: September 29, 2015, 02:39:20 am »
Don't waste your money on this game. Ace... I think it is time we dismantle the thug 2 engine and start creating brand new levels for us to play in.

10
General THPS(X) / What is up with all the THPS5 hate?
« on: September 23, 2015, 02:13:39 am »
Alright. I have been one of the many people who have been vocal about the Tony Hawk franchise since I felt it died with THUG 2. THP8 really made me sad. EA's Skate pissed me off too much. But I really see a lot of promise with THPS5. I don't know why but I get this feeling after watching the game play vids of it and I can't help thinking that the TH series might actually get its head out of it's ass and finally create a good game for once.

I already have it Digitally Pre ordered. I am getting all of the extra DLC shit. Every bit of new content being shown for this game so far has already gotten me anxious to play it.

But looking at the majority of youtube videos on THPS5 with people making comments from all different colors in the full spectrum of gamers when it comes to skating games.... WHY ALL THE HATE? This game actually looks like a revival of the onced presumed dead TH Series. I really think THUG PRO struck a nerve with the TH guys and finally we got something that resembles WHAT WE WANT TO PLAY. (Even though I can't play it. I don't have THUG 2 for PC.)

But for once they are bringing back A LOT OF SHIT that has been missing since THP8.

But seriously the amount of negative press I see on youtube is coming from Left field, right field, center stage, and from the peanut gallery. What the fuck is happening? I hear a lot of people giving THPS5 the snub nose while some others are just happy to have it, yet still have some sort of retort for the game. I am fairly certain this game is going to do well and it is finally coming back to the arcade feel I remember. THPSHD sucked but I still bought it regardless. Only to show that I want to see a better TH game. Finally it happened.

Some of the videos I saw had them picking on the "Magnet rails." What? people are fucking stupid. Tony Hawk always had magnet rails. If you held down triangle you'd snap to a rail as long as you were within proximity to it. Saying the game doesn't feel realistic. Fucking TH games were never realistic. (The realistic shit is what brought down the TH series if I remember correctly. It scared the TH Team when EA was talking about their project for a skating game.)

Yeah this sort of got to me but I think everyone will be proven wrong once this game comes out and they shut up and finally play the damn game. I could just be blowing out a bunch of hot air and suddenly next week around this time I will become silent about this game if it trully does suck. But after seeing that much gameplay? I am inclined to say I will give it an 8/10 based off of what I have seen and haven't even played.

I am sure this game will once again get better with each new installment if it can prove to us it knows what we want.

11
General THPS(X) / I just hope KOTH is still KOTH.
« on: August 22, 2015, 03:47:46 am »
I actually watched a few of the youtube videos that you guys have up for koth. Watching all of our old juke maneuvers being captured.... and seeing a lot of old stuff mixed in with some new ones....

I just hope that KOTH in THPS5 is still the same KOTH that we all know and still play.

I still own a copy of THUG1 for PS2.

But here is hoping that KOTH will still play in THPS5 as it did in THPS4. And.... I am currently looking for a PS4....

12
Create-A- / Create-A-Music...
« on: July 05, 2015, 10:07:50 pm »
I have always been creating music since 2006.

You can download most of my stuff for free. I use three different portals for my music. I mostly stay in the EDM-Drum n Bass section though. I also do Ambient.

Not a real big fan of Dubstep though.

My profile on Newgrounds:

http://guilmonx.newgrounds.com/audio/

My profile on Soundcloud:

https://soundcloud.com/the_con-sept

My profile on Reverbnation:

https://www.reverbnation.com/theconsept

My profile on FA:

http://www.furaffinity.net/gallery/giulxainx/

Have a listen if you want. I have done mixes with thrash metal before with a friend over FA. That track would be Brawl in the backyard.

13
Other Games / Neverwinter
« on: July 04, 2015, 04:09:02 am »
I started playing this game a while back. I have spent a few hundred bucks on it already. But if you need a cleric or a rogue in your party. I am currently around level 36-38. Not really playing to gain the highest level. Just having fun messing around in the game doing what ever.

http://www.arcgames.com/en/games/neverwinter

If you want to start playing this game just add me on steam: the_con_sept.

If you add me on steam I have a lot of other games as well. Including Counterstrike, Primal Carnage, and a few others.

Pages: 1