Alright... so you have a model that you want to import into THUG Pro... But the model is not in a T-Pose.... And it doesn't have an Armature. (the number one thing used to quickly manipulate object vertices on the fly.) if your model has an Armature, or Bones, then skip to the next Phase.
if you don't know what an armature is? Then start below here.
PHASE 1
=============================================
So. You have Blender. (The version I am using is Blender V2.78C.)
Open it up.
And I am assuming you know how to import objects....
So go ahead and import the object and have it sitting in front of you. If it has multiple objects (because of hair physics/ back pack/ awesome looking hat) That is just fine. You will still be able to move them in the armature correctly. Just know that how ever you deform the model, it might mess up because some vertices may be connected to the wrong bone. And I will show you how to fix that.
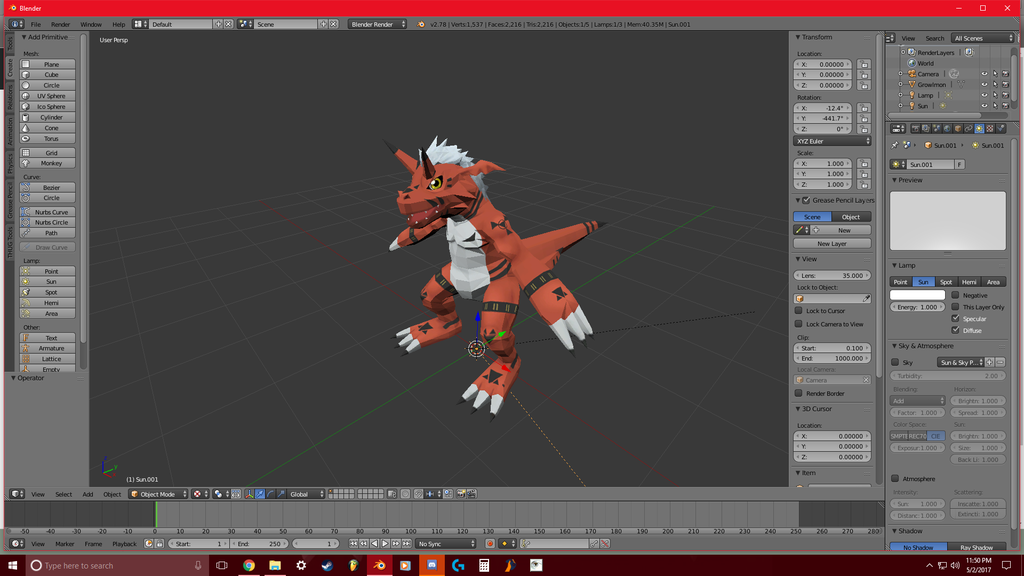
So everyone knows I like importing hard to do skaters. (Mainly dinosaurs, Digimon, Weird stuff.)
So today I am showing you how to get a Growlmon model that is not in a T-Pose, into a T-Pose!
Look at this! This one looks difficult! Holy **** Con-Sept! How long will this one take you?

Not long at all actually. It takes me longer to create these tutorials than to do things myself.
So. GO INTO WIRE FRAME MODE!
(Side note... Sometimes your model may appear to have no eyes... or UV maps messed up... Sometimes they are actually hidden behind eyelids, or something like that of the sort. So different game engines use different methods of blinking or movement... You might want to check your model in Material mode just to make sure everything looks ok.)
First before we begin... Almost every single model that I come across has several "duplicated vertices" sitting on top of each other. So hit A on your keyboard and have all of the vertices selected. Then hit Space bar and type in "Remove doubles," and then hit enter. On the top it should say "Removed X amount of vertices"
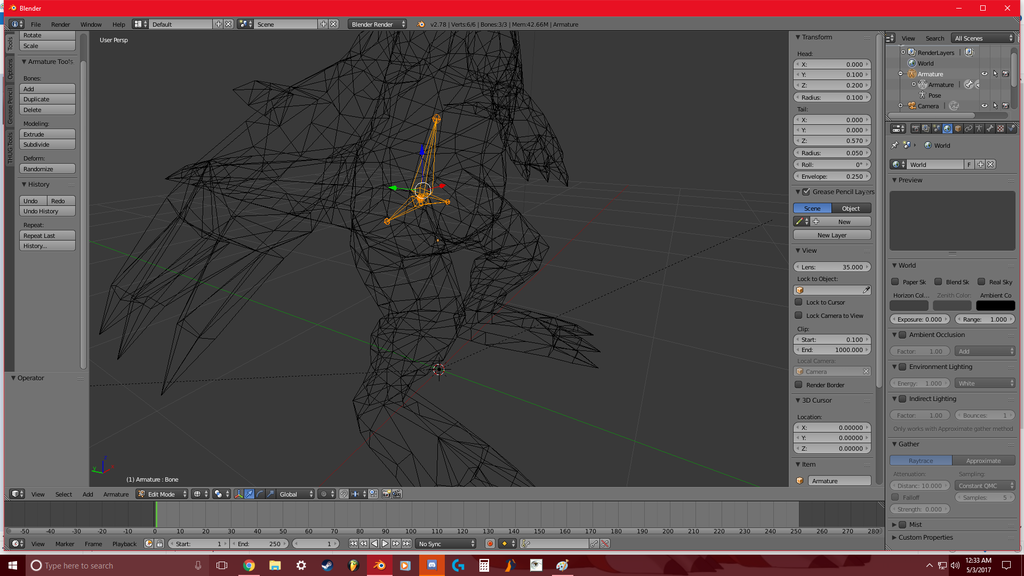
Then you need to add your first bone. I recommend starting with the spine (Middle of entire skater) so that you can quickly get a good sense of how models are rigged up to be animated.
What you want to do is try your best to position this bone in the absolute center of all of the vertices inside of your model.
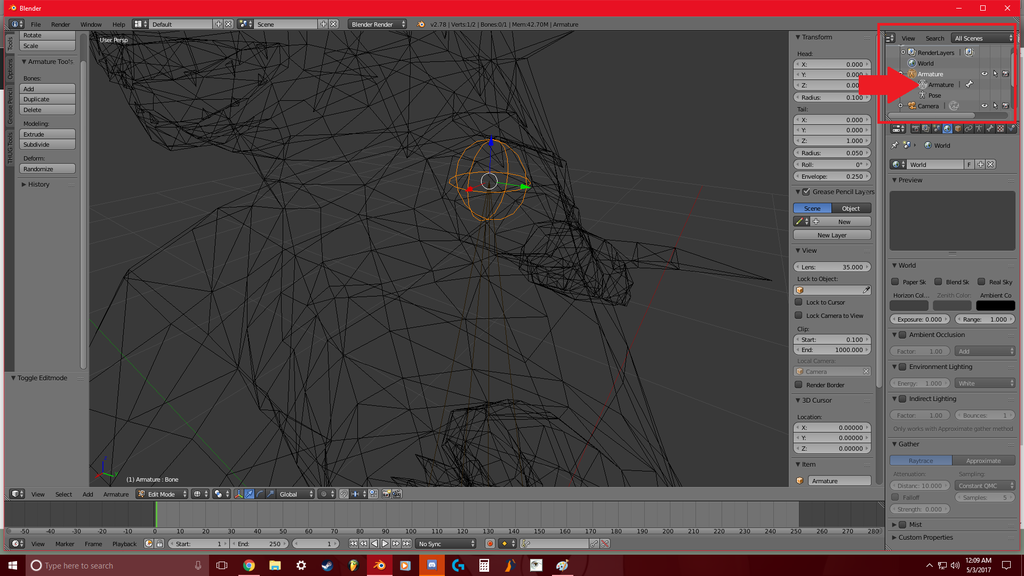
So create a bone by selecting your model (make sure it is yellow) and go into the create bar on the left and hit the little option that says "Armature."

"OMG Con-Sept! I am reporting you for posting NSFW content!"
Relax... you have to move that bone up into the spine..... (hahahahahaha!)
"god daamit consept.. you just made it XXX rated...."
Ok. You do that by editing it's current location in the transformation box. - (if you are not seeing that little panel on the right side, look for a little tiny + Sign located in the 3D plane space window along the edge of the right side. You should click that little plus to bring it up.)
In the next picture I don't have a red box to help you locate it, but you can see it on the right side... Just edit its Z value upward.
(Sometimes you might not have a model that is sitting at an XYZ value of 0,0.0 So you need to just move the bone into the correct place. That is why selecting your model first, and then selecting the add armature button makes it quicker to get that bone right in the middle.)

Now we have the next problem where people might get stuck....
The bone is TOO BIG and NOT AT THE RIGHT ANGLE..... (God dammit Con-Sept.... why are you narrating a gay porno?)
So we need to get it corrected in two ways. First we need to SIZE IT DOWN.... Do so by selecting the armature object string located in the top right window and select the bone itself. You should see the armature suddenly select a spherical little object like so:
Now when you look at the object transform panel on the right, it says THE HEAD... and the tail.... If you move one value and it doesn't move the sphere you have selected, then try moving the other one. Both of them can be quickly manipulated this way.
Now when moving the little spheres inside of the mesh please keep in mind all of the other bones you may need to extrude from either side to connect the hips, the legs, the arms... the neck... the head... ALL of those bones.... So here I have it set up so I can quickly extrude the leg bones, and the tail bone. And I don't have to mess with too many other settings.
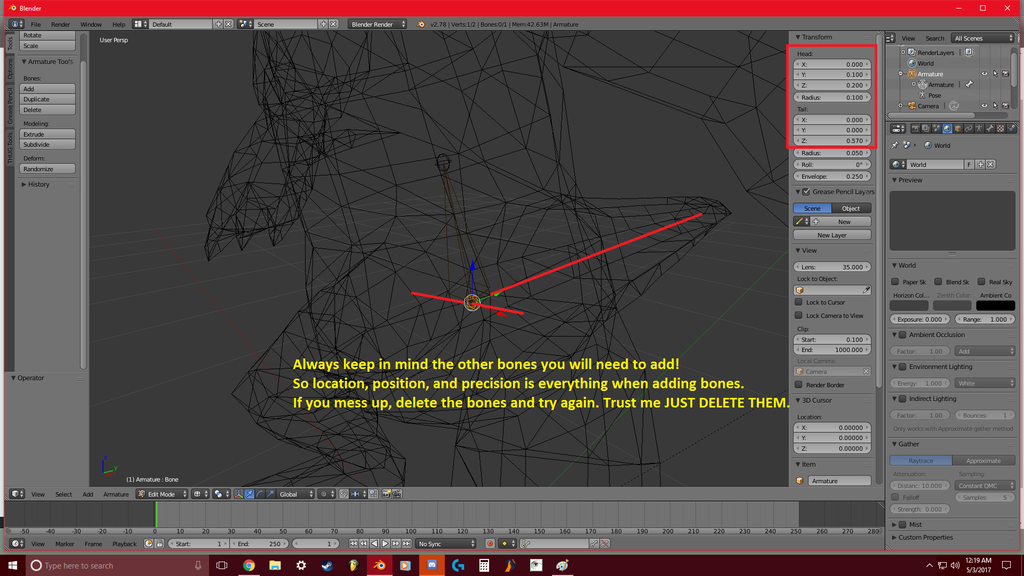
Always make sure you have a good location for your next extruded bone.
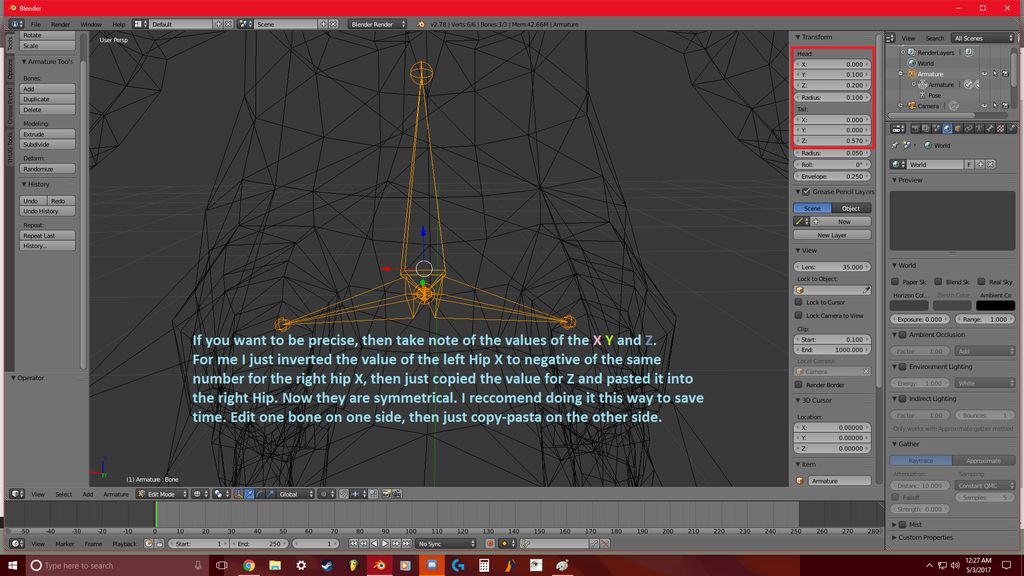
As explained in the picture, edit one side of one bone for the left... or the right if you are like that... Then just copy certain X, Y, or Z values to quickly mirror the other bone. A lot of other people like to have a mirror effect happen when they extrude. but sometimes you may actually come across a different problem where the model isn't exactly at perfect angle. maybe the pose is that of a statue... So that means your rigging will be harder. But I am a bit masochistic. I like hard things. This model I consider to be intermediate. Give me a challenge! hahahahaha!
And besides, sometimes doing things with the mirror effect might create some interesting unexplained artifacts or extra bones. Or sometimes makes it disjointed. So I do everything by hand.
Now this is where things can get very interesting later on. This model has a bit of a twist to it. a 45 degree angle twist to it. It may cause a problem later on, but for now I am going to ignore that. We just need to get the bones in place.
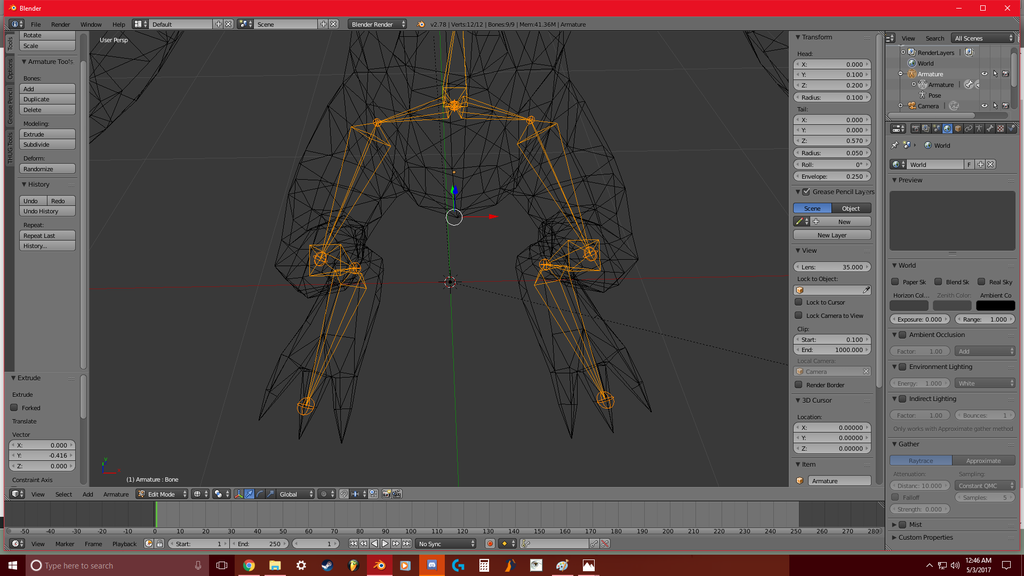
When it comes to Growlmon's feet, he has toes that stick WAY out... And they sort of fan out as well. Just make the bone go a little bit outside of the model's base foot. but not too far. if you have a model like this growlmon you don't have to make a bone for each toe. Just skip that... We will get to it in a minute.
Get the rest of the model rigged up and have it look like this first. And make sure the bones are inside of the model.
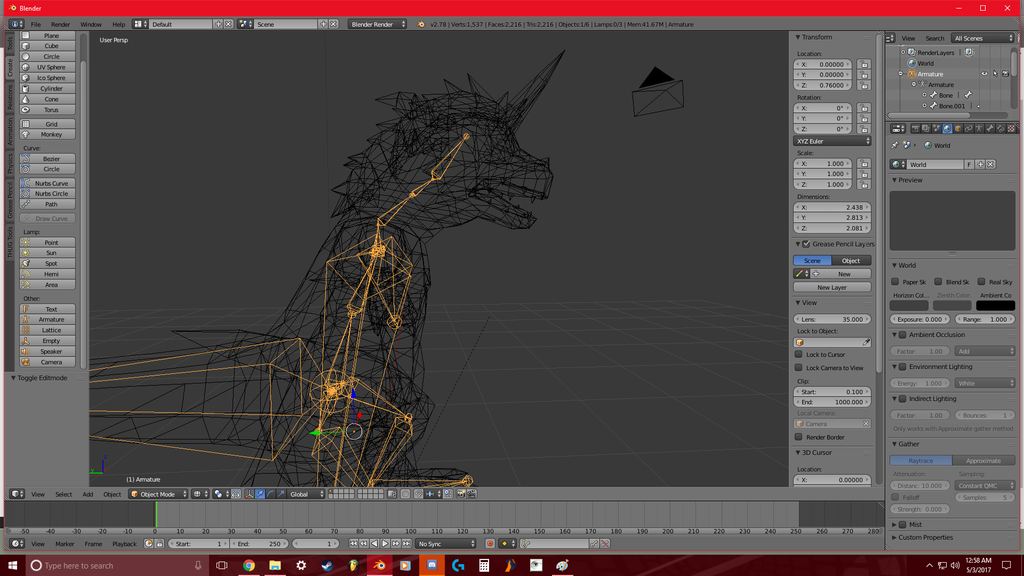
When it comes to growlmon's head... it is hunched over his body.... Notice how there are a few extra bones in his neck? That is because I need to straighten him out a bit in the neck in order for this to work... Otherwise he will be looking upwards when I get him into the T-Pose. Just sort of think about how levers work when they have something covering them that stay in a certain position.
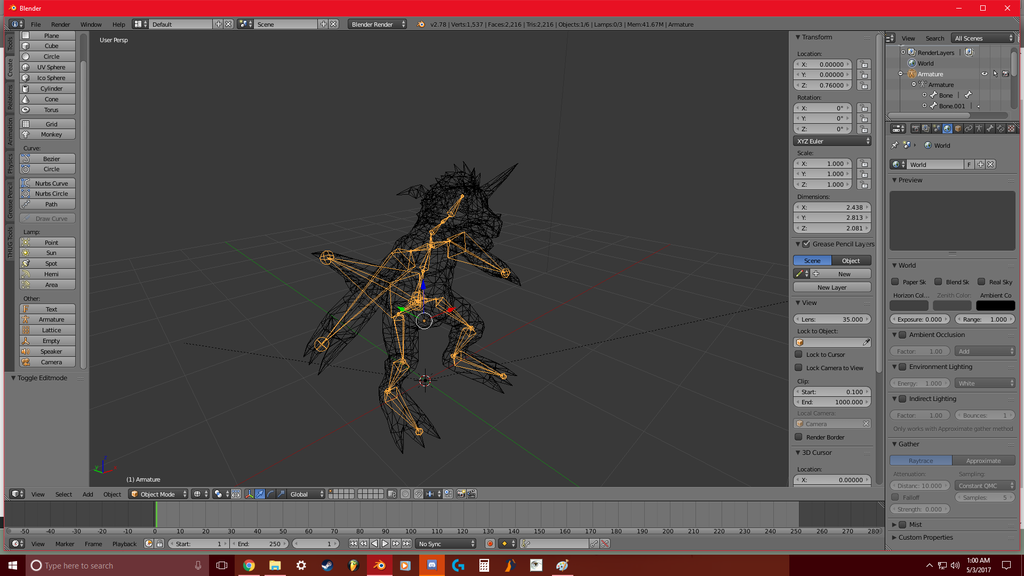
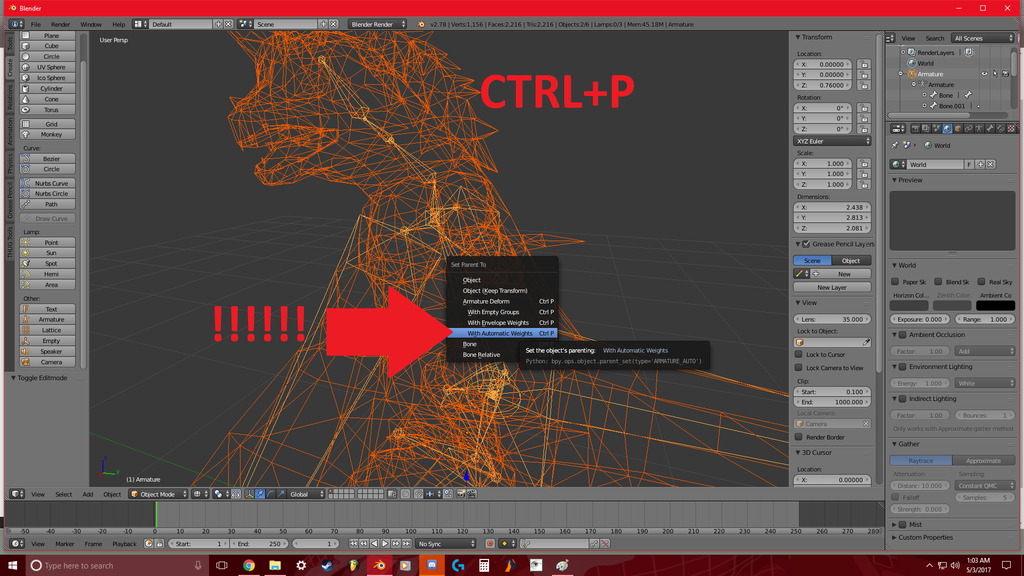
Now that your model has an armature structure inside of him... It is now time to do what ASDF said in the other tutorial... Which is Step 6.
6. in object mode, select your model, then the armature. press ctrl-p and select armature deform.
Now since we are not doing a weight transfer to a skater model yet, we actually have to do something different here. When the menu box opens we actually need to add vertices to certain groups for the bones to manipulate. So instead we select: Armature Deform->WITH Automatic Weights!
Now we go onto the next phase....